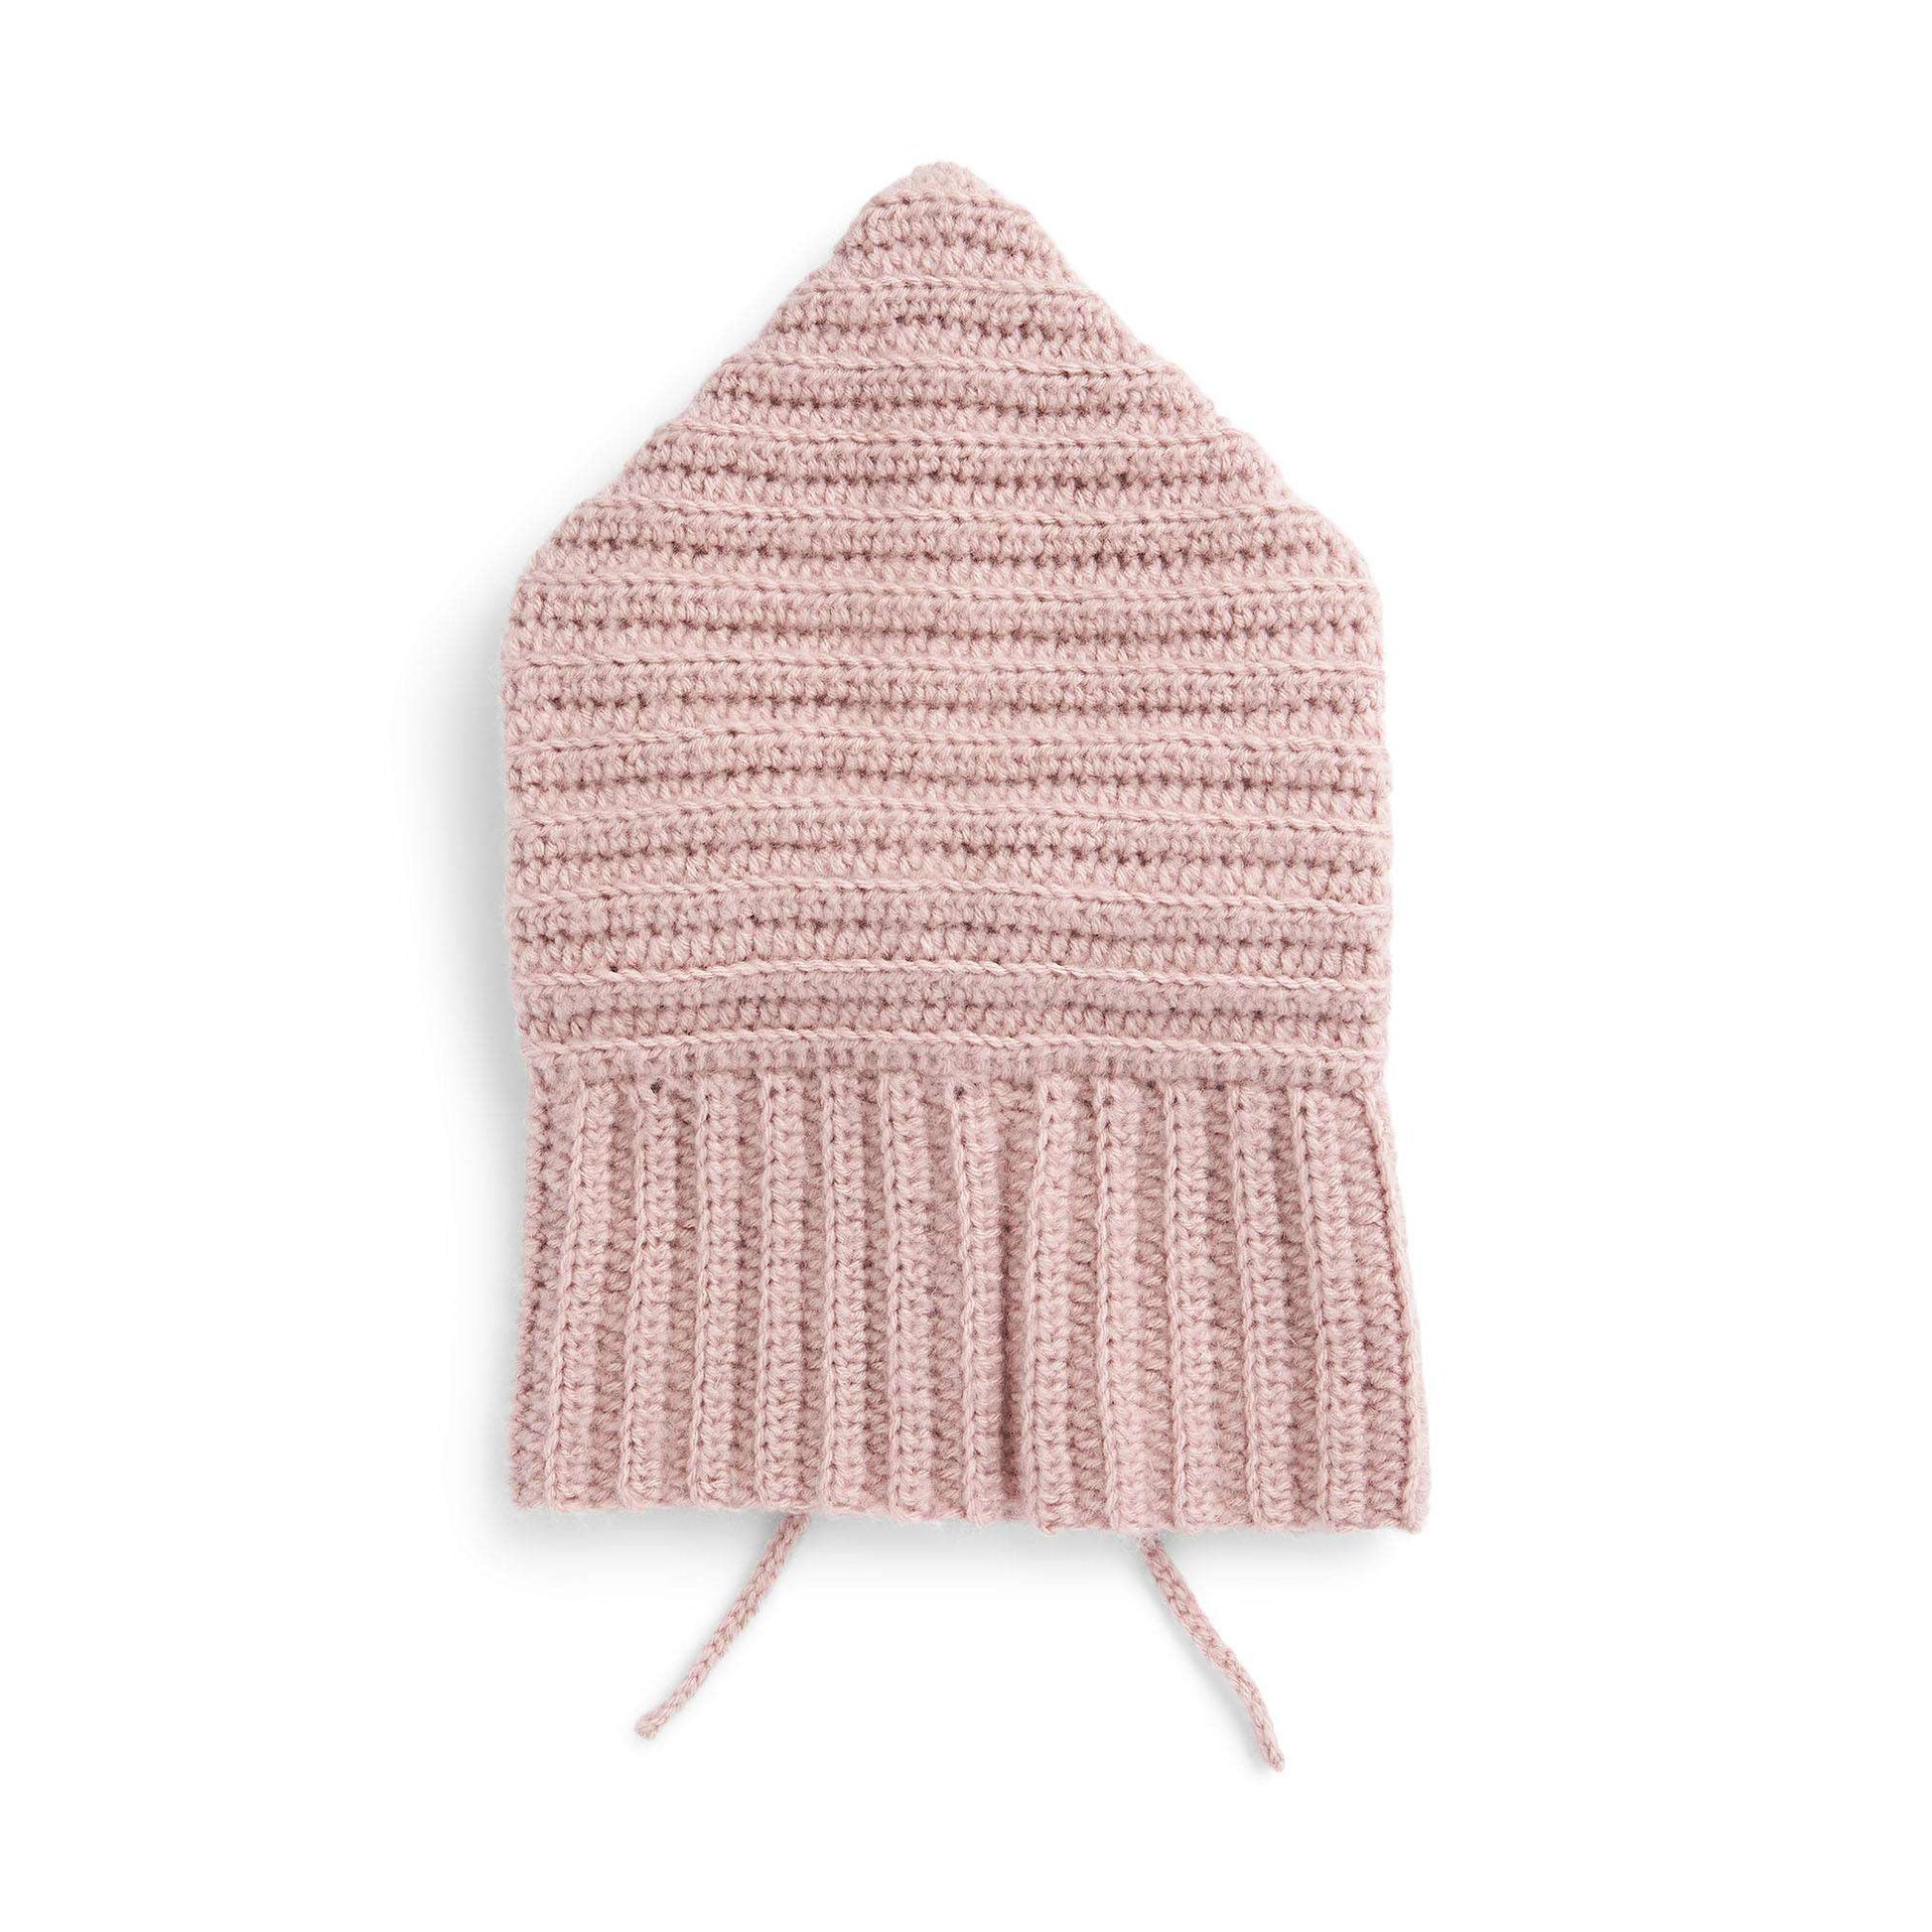
Free Red Heart Cozy Crochet Ribbed Hood Pattern
Item# RHC0116-031910V
The perfect cold weather accessory, this easy crochet hood is soft and heathery in Red Heart Super Saver Brushed.
View full details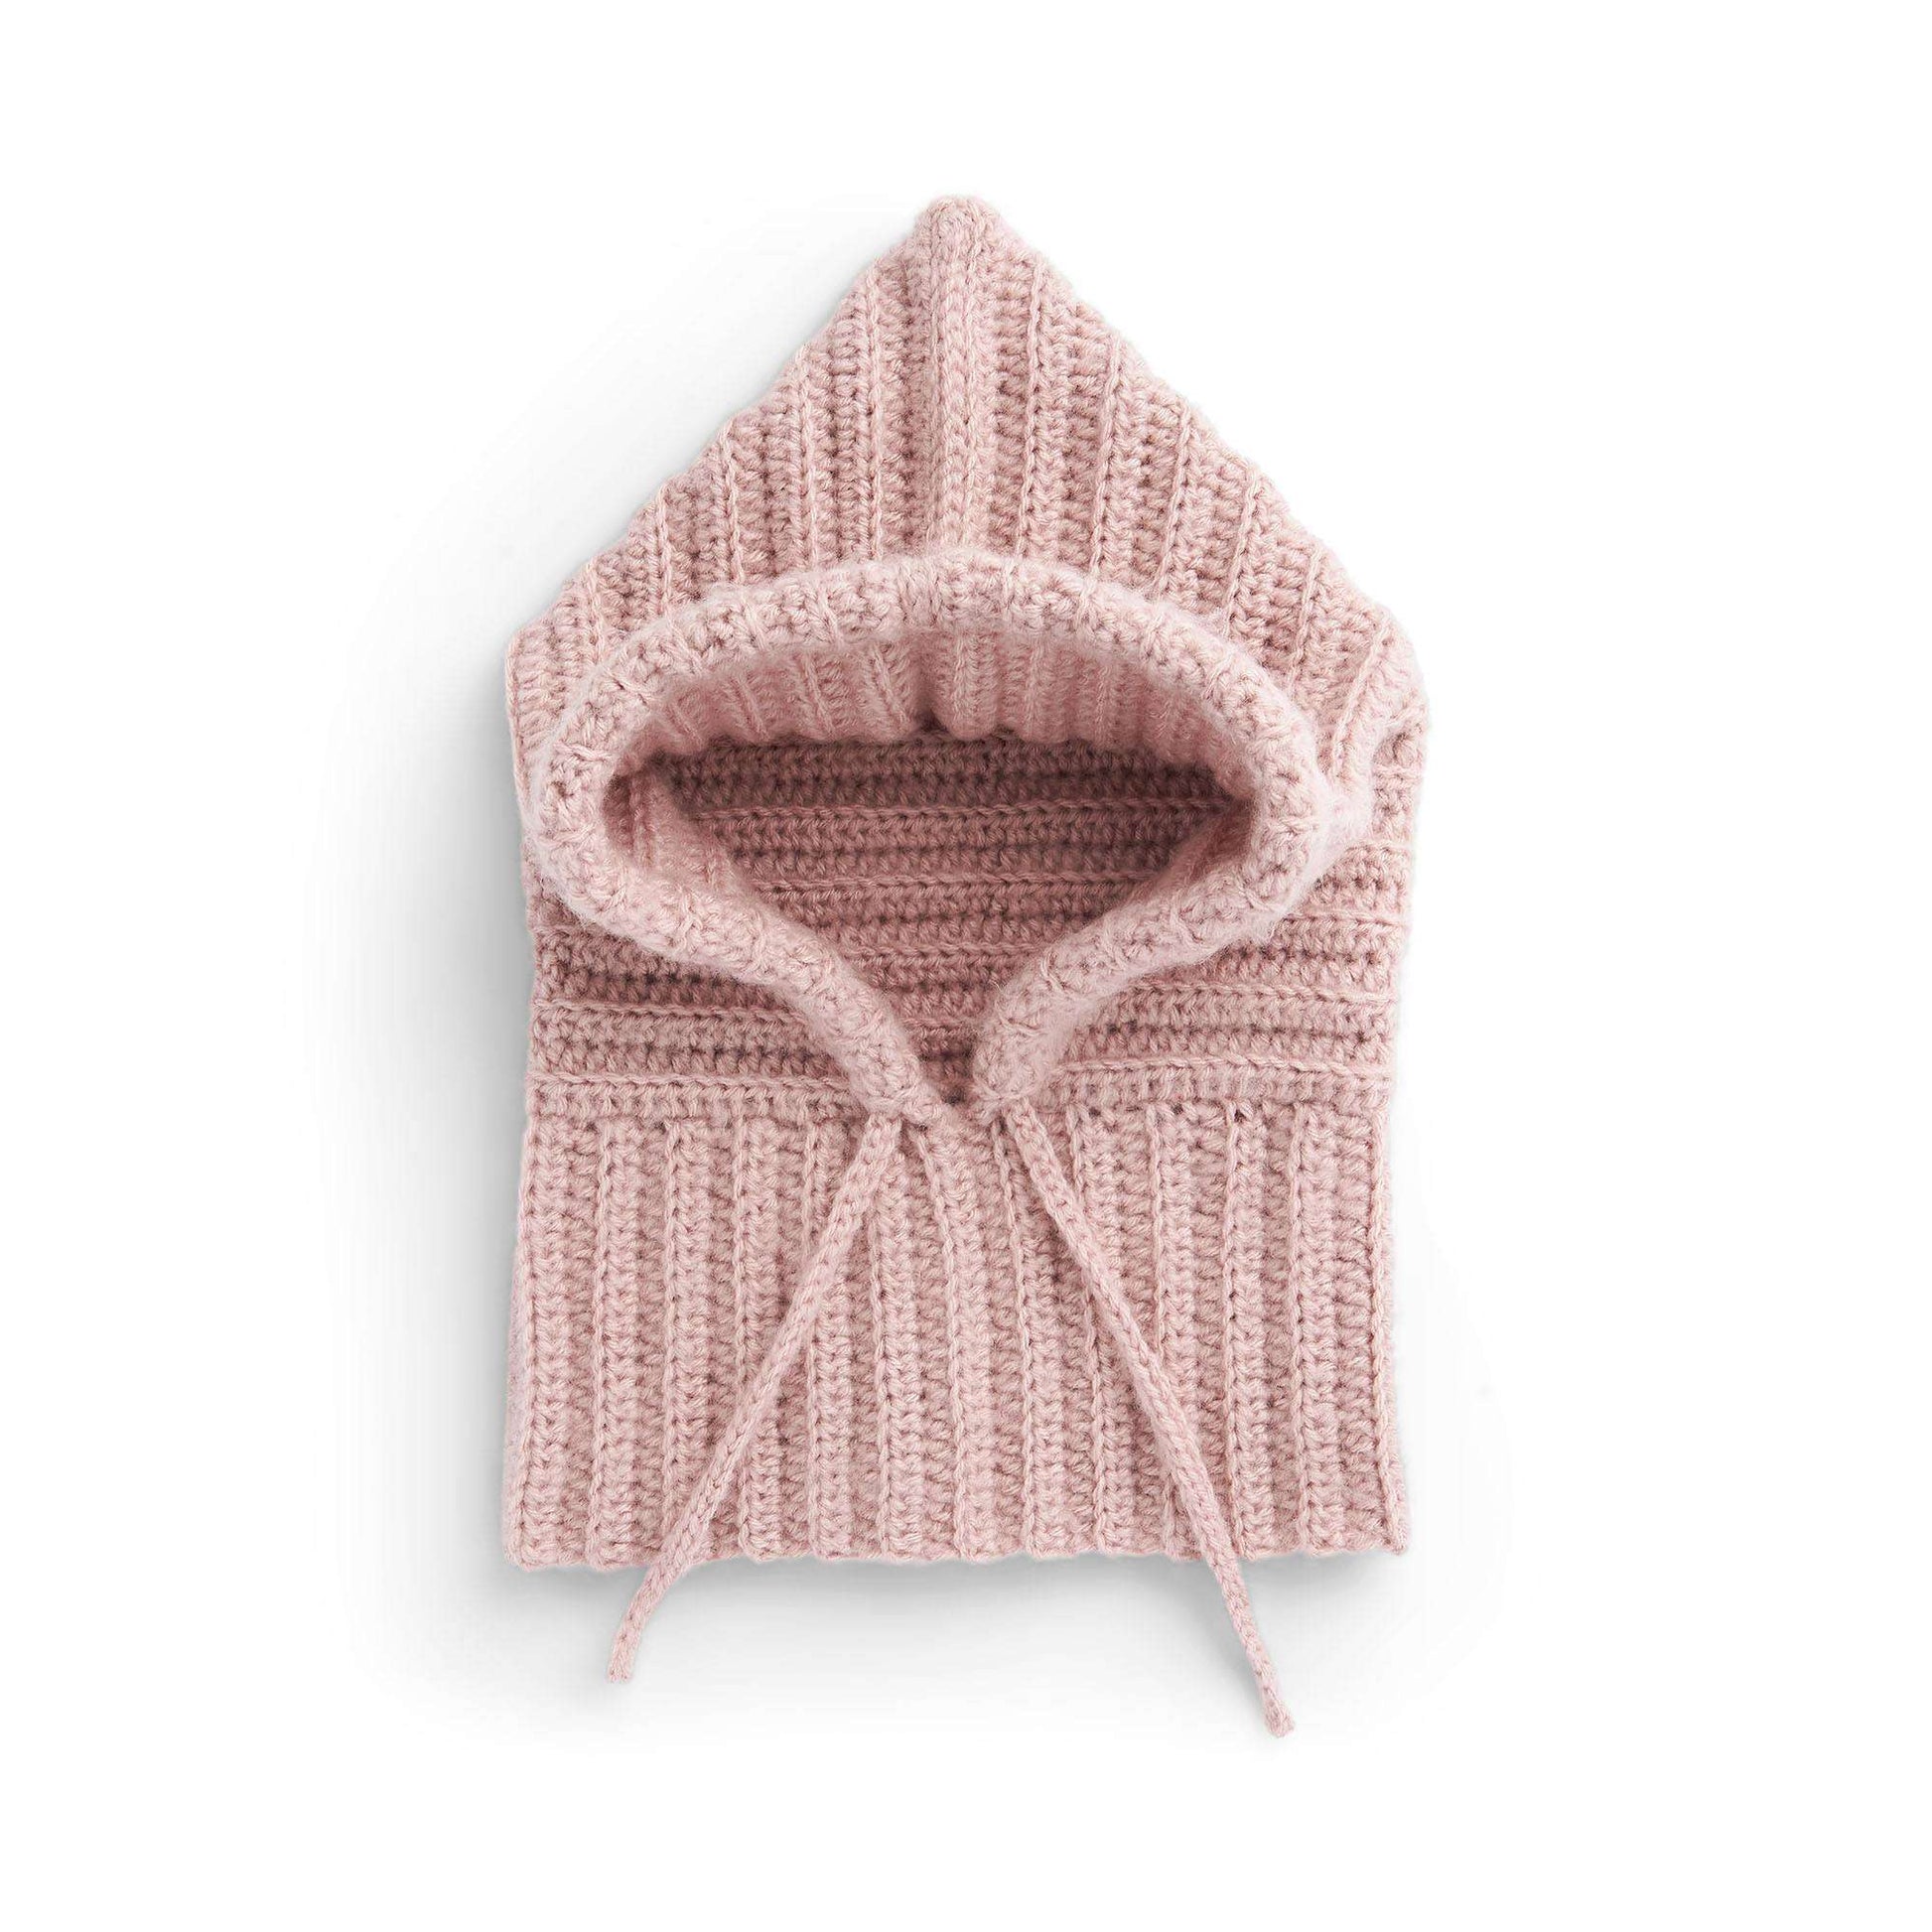


Free Red Heart Cozy Crochet Ribbed Hood Pattern
Item# RHC0116-031910V
The perfect cold weather accessory, this easy crochet hood is soft and heathery in Red Heart Super Saver Brushed.
customize your pattern kit

Out of Stock
Hurry, only 0 left!
In stock
Out of Stock
Hurry, only 7971 left!
In stock
Out of Stock
Hurry, only 2125 left!
In stock

Out of Stock
Hurry, only 281 left!
In stock
-
Description
Free Easy Crochet Cowl Pattern for Women
Material Notes
Don’t forget to pick up the finishing touches for your project! Take a look at the list of supplies you’ll need that aren’t included in your kit.
Kit doesn’t include:
- Safety pin
-
Sizing Notes
Sizing Notes
Making the right size is important! To make sure your project turns out the size described, always make a gauge swatch to match your tension. First time swatching? Learn more about crocheting a gauge swatch!
Finished Measurements
Approx 28" [71 cm] around x 20" [51 cm] deep.
-
Care
Pattern Care
Treat your finished project right! Make sure you read the care directions closely so your hard work ages gracefully.
- Do Not Bleach
- Do Not Dry Clean
- Do Not Iron
- Machine Wash in Cool Water
- Dry Flat
-
Reviews & Ratings
Reviews
Filter Reviews
RatingLocale1 to 1 of 1 Review1 – 1 of 1 ReviewHighest to Lowest RatingOn, CanadaSkill LevelIntermediate4 out of 5 stars.Super cute project
2 years agoFairly easy to follow and make - depending on how fast you crochet you could have this done in 2 sittings. I've made this in a couple different yarns and it always ends up looking awesomeYes, I recommend this product.
Helpful?Clarity of Pattern, 4.0 out of 5 -
Questions & Answers
Questions
Start typing your question and we'll check if it was already asked and answered.1 - 6 of 6 QuestionsQ: Is there a video of this “easy” pattern? I sure hope so! I’m not doing something right. I have the cowl and slip stitches done, but from chain 5 turn all the way through the drawstring holes When you chain 5 is it straight up in the air or is it attached
3 months ago1 AnswerA: We apologize, but we do not have a video for the Cozy Crochet Ribbed Hood. The chain 5 is worked at then end of the slip stitches as a continuation of that row. In the next row, you will hdc into the third stitch, creating a three stitch extension to the existing fabric which will be used to form a casing to contain the drawstring. You will be skipping stitches and creating a ch1 to create an entry and exit hole for the drawstring in the casing. Please work the stitches as specified in the pattern: 1 hdc in 3rd ch from hook. 1 hdc in each of the next 2 ch. 1 hdc in next sl st (working under both loops). Ch 1. Skip next sl st – Drawstring Hole made. 1 hdc in each sl st to last 5 sts (includes 2 sl sts and 3 ch). Ch 1. Skip next sl st – Drawstring Hole made. 1 hdc in next sl st. 1 hdc in each of last 3 ch. Turn. 88 hdc and 2 ch-1 sps. Then, in the next row, work into all the stitches, including the chains made about the spaces to continue with your hood. We hope this explanation is exactly what you need to move forward with the hood portion. You’ll be done before you know it! Happy hooking!
3 months agoHelpful?Q: In which direction do I fold the hood once I've finished making the 13"? I'm having trouble picturing in my mind what you mean by "fold it in half."
4 months ago1 AnswerA: For your Cozy Crochet Hood, you are folding it in half with wrong sides facing one another so that you can sew up the seam that will be at the top of the head. You will be seaming the last row you crocheted.
4 months agoHelpful?Q: I don't understand the 'Ch 3, leaving a 35" [89 cm] long end for seaming Drawstring Casing later.' I don't understand any part about it - with what yarn part - a new one? And how do I get to be able to leave such an end and then proceed?
4 months ago1 AnswerA: The instruction "Ch 3, leaving a 35" [89 cm] long end for seaming the Drawstring Casing later" means that you should create a chain of three stitches while making sure to leave a tail that is 35 inches (or 89 centimeters) long. This long tail is important because it will be used later to sew or seam the Drawstring Casing. To help prevent the long tail from getting tangled while you work, you can carefully wind it around a spool or similar object. To achieve this, pull out a strand of yarn 36" long, create a loop at the end of the 36", and chain 3. Now you can roll up or wind the yarn to hold it if desired.
4 months agoHelpful?Q: can you explain to me the 2nd row of the hood the making of the 2nd drawstring hole
a year ago1 AnswerA: After you have made the first drawstring hole, you will work 1 hdc in each stitch until you have 5 sts left (these 5 sts will include 2 sl sts and 3 chains). Chain 1. Skip next sl st. You have now made the second drawstring hole and have 4 sts left. 1 hdc in next sl st. 1 hdc in each of last 3 chains.
a year agoHelpful?Q: Are there any additional photos that can help show the steps and how to assemble?
2 years ago1 AnswerA: We are sorry for our late reply and although we don't have any additional photos we hope the following will help: Note: Before folding the top of the hood, notice your front loops and back loops of each stitch. When you fold the fabric to have the stitches matched up together, you will have a set of loops that touch and the opposite loops toward the outside. You will slip stitch into the loops that touch: one from each layer of the now-doubled fabric. To seam the hood, you will fold the top with the wrong sides of the fabric facing (this is the inside of the hood). Double check that you have an equal number of stitches on each side for even seaming (45 and 45). Begin at the corners and seam as described in the previous paragraph toward the fold, working one slip stitch per set of loops. Weave ends when finished.
2 years agoHelpful?Q: Hello, I have already made the cowl portion of this pattern. When you say sl st 84 sts, do you mean around the long edge of the cowl tube? Also, the 'next row' after that one uses the term 'ch' and 'sl st' interchangeably to refer to the foundation row?
Anonymous2 years ago1 AnswerA: Thank you for your question. Yes, please work 84 stitches around the long edge of the cowl. This is what you will build on to create the hood as seen in the picture. The next row doesn't use ch and sl st interchangeably. At the beginning of the next row, you are working the 1st hdc into the 3rd chain from your hook (of the chain 5 from the end of the joining row) and then the next 2 ch. Hereafter, you are working (and skipping) the slip stitches done in the joining row until you get to the end of the row. At this point you will also work into the last 3 chains. This refers to the ch 3 where you left the 35" end for seaming. We hope this helps clarify. Please let us know if you have any further questions.
2 years agoHelpful?