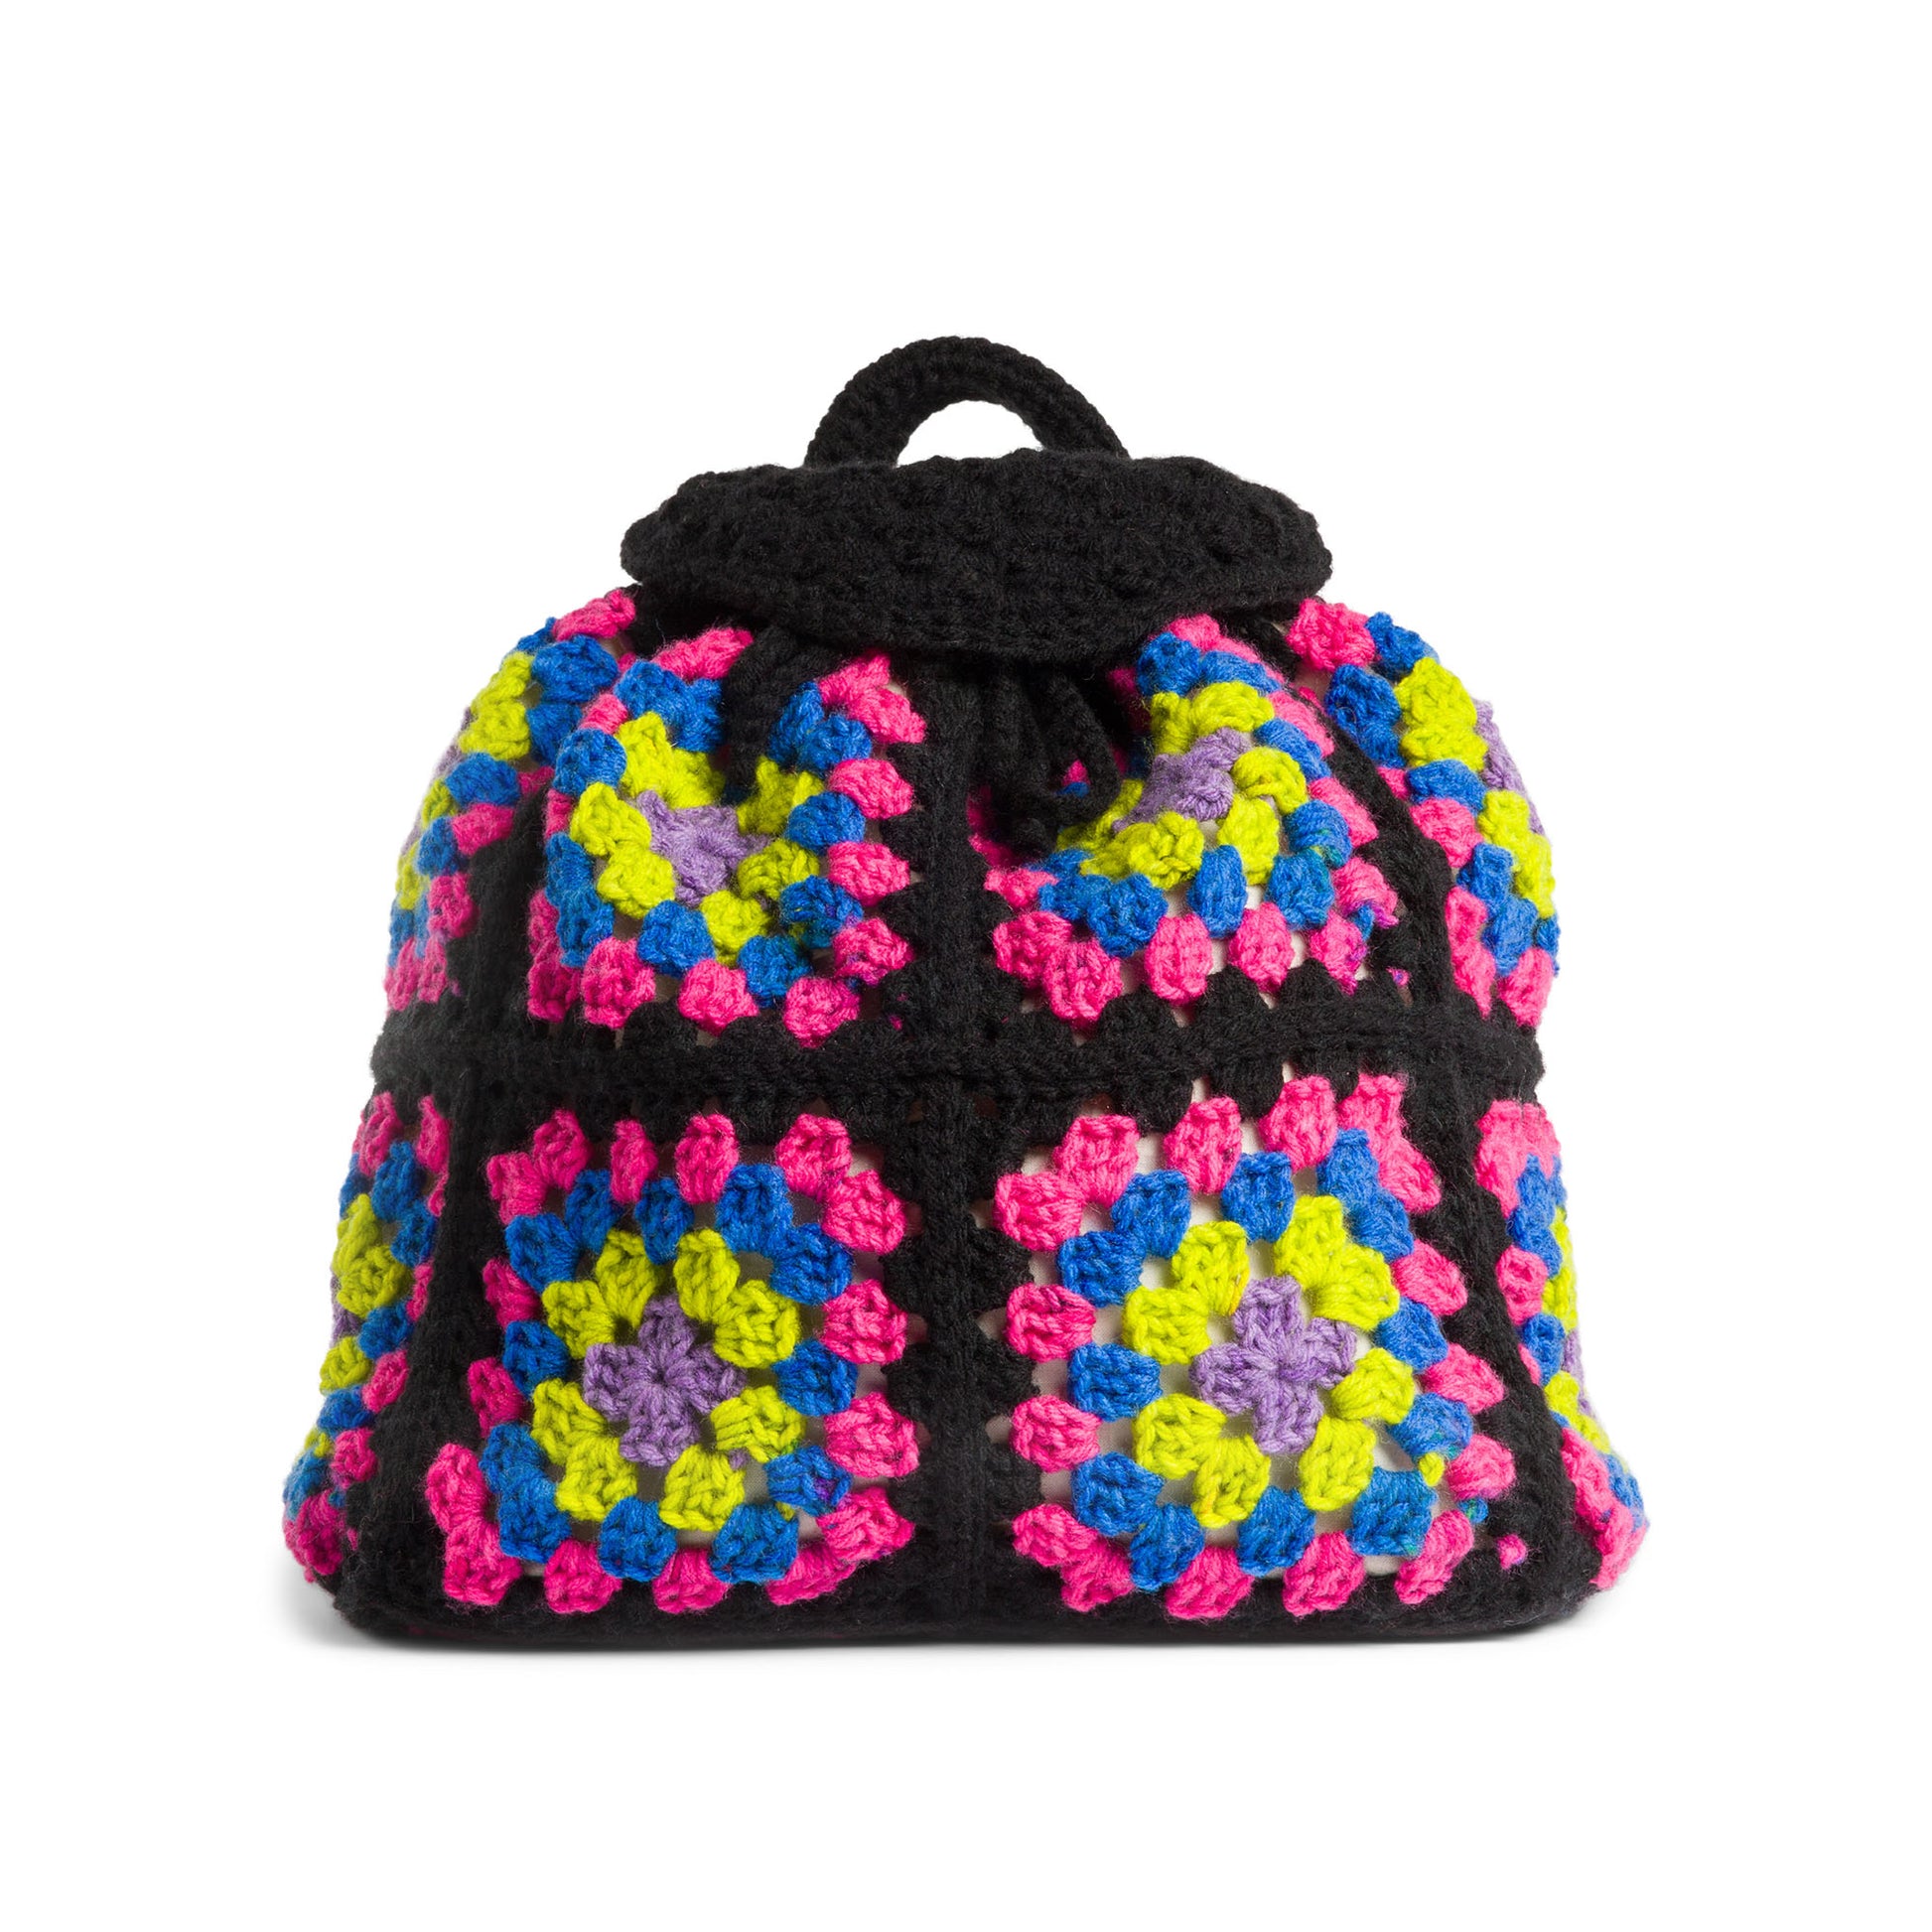
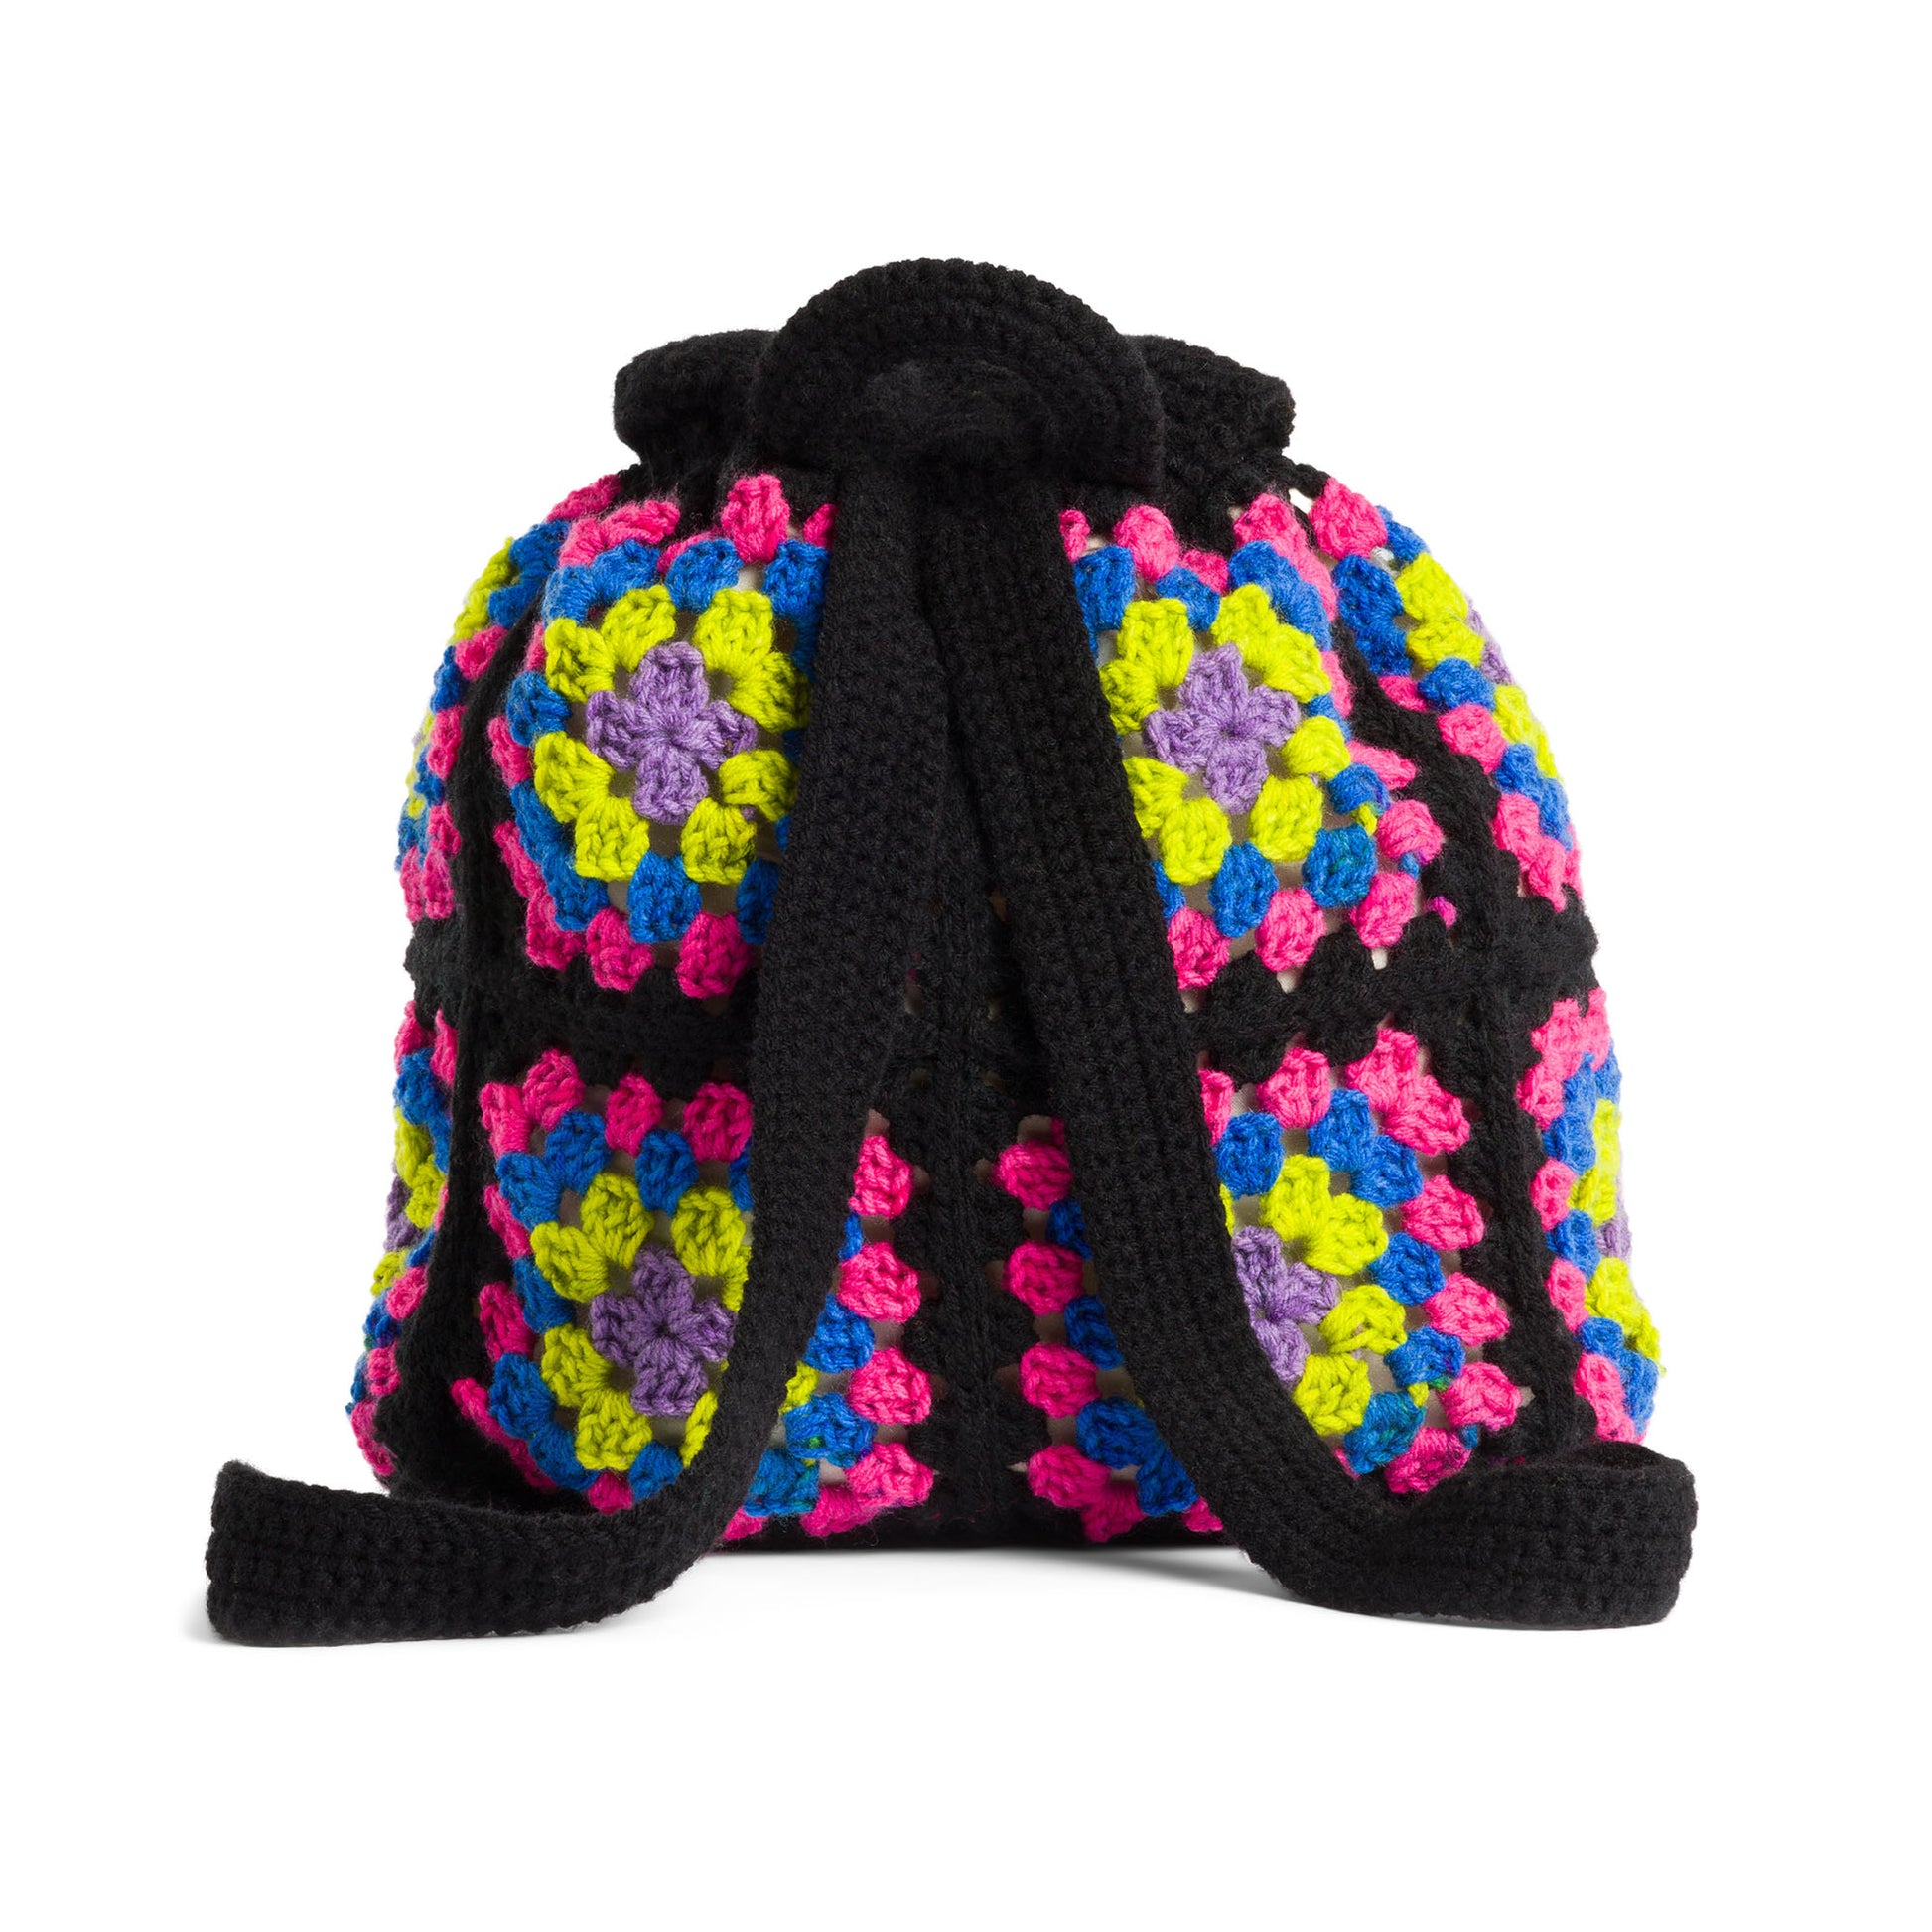
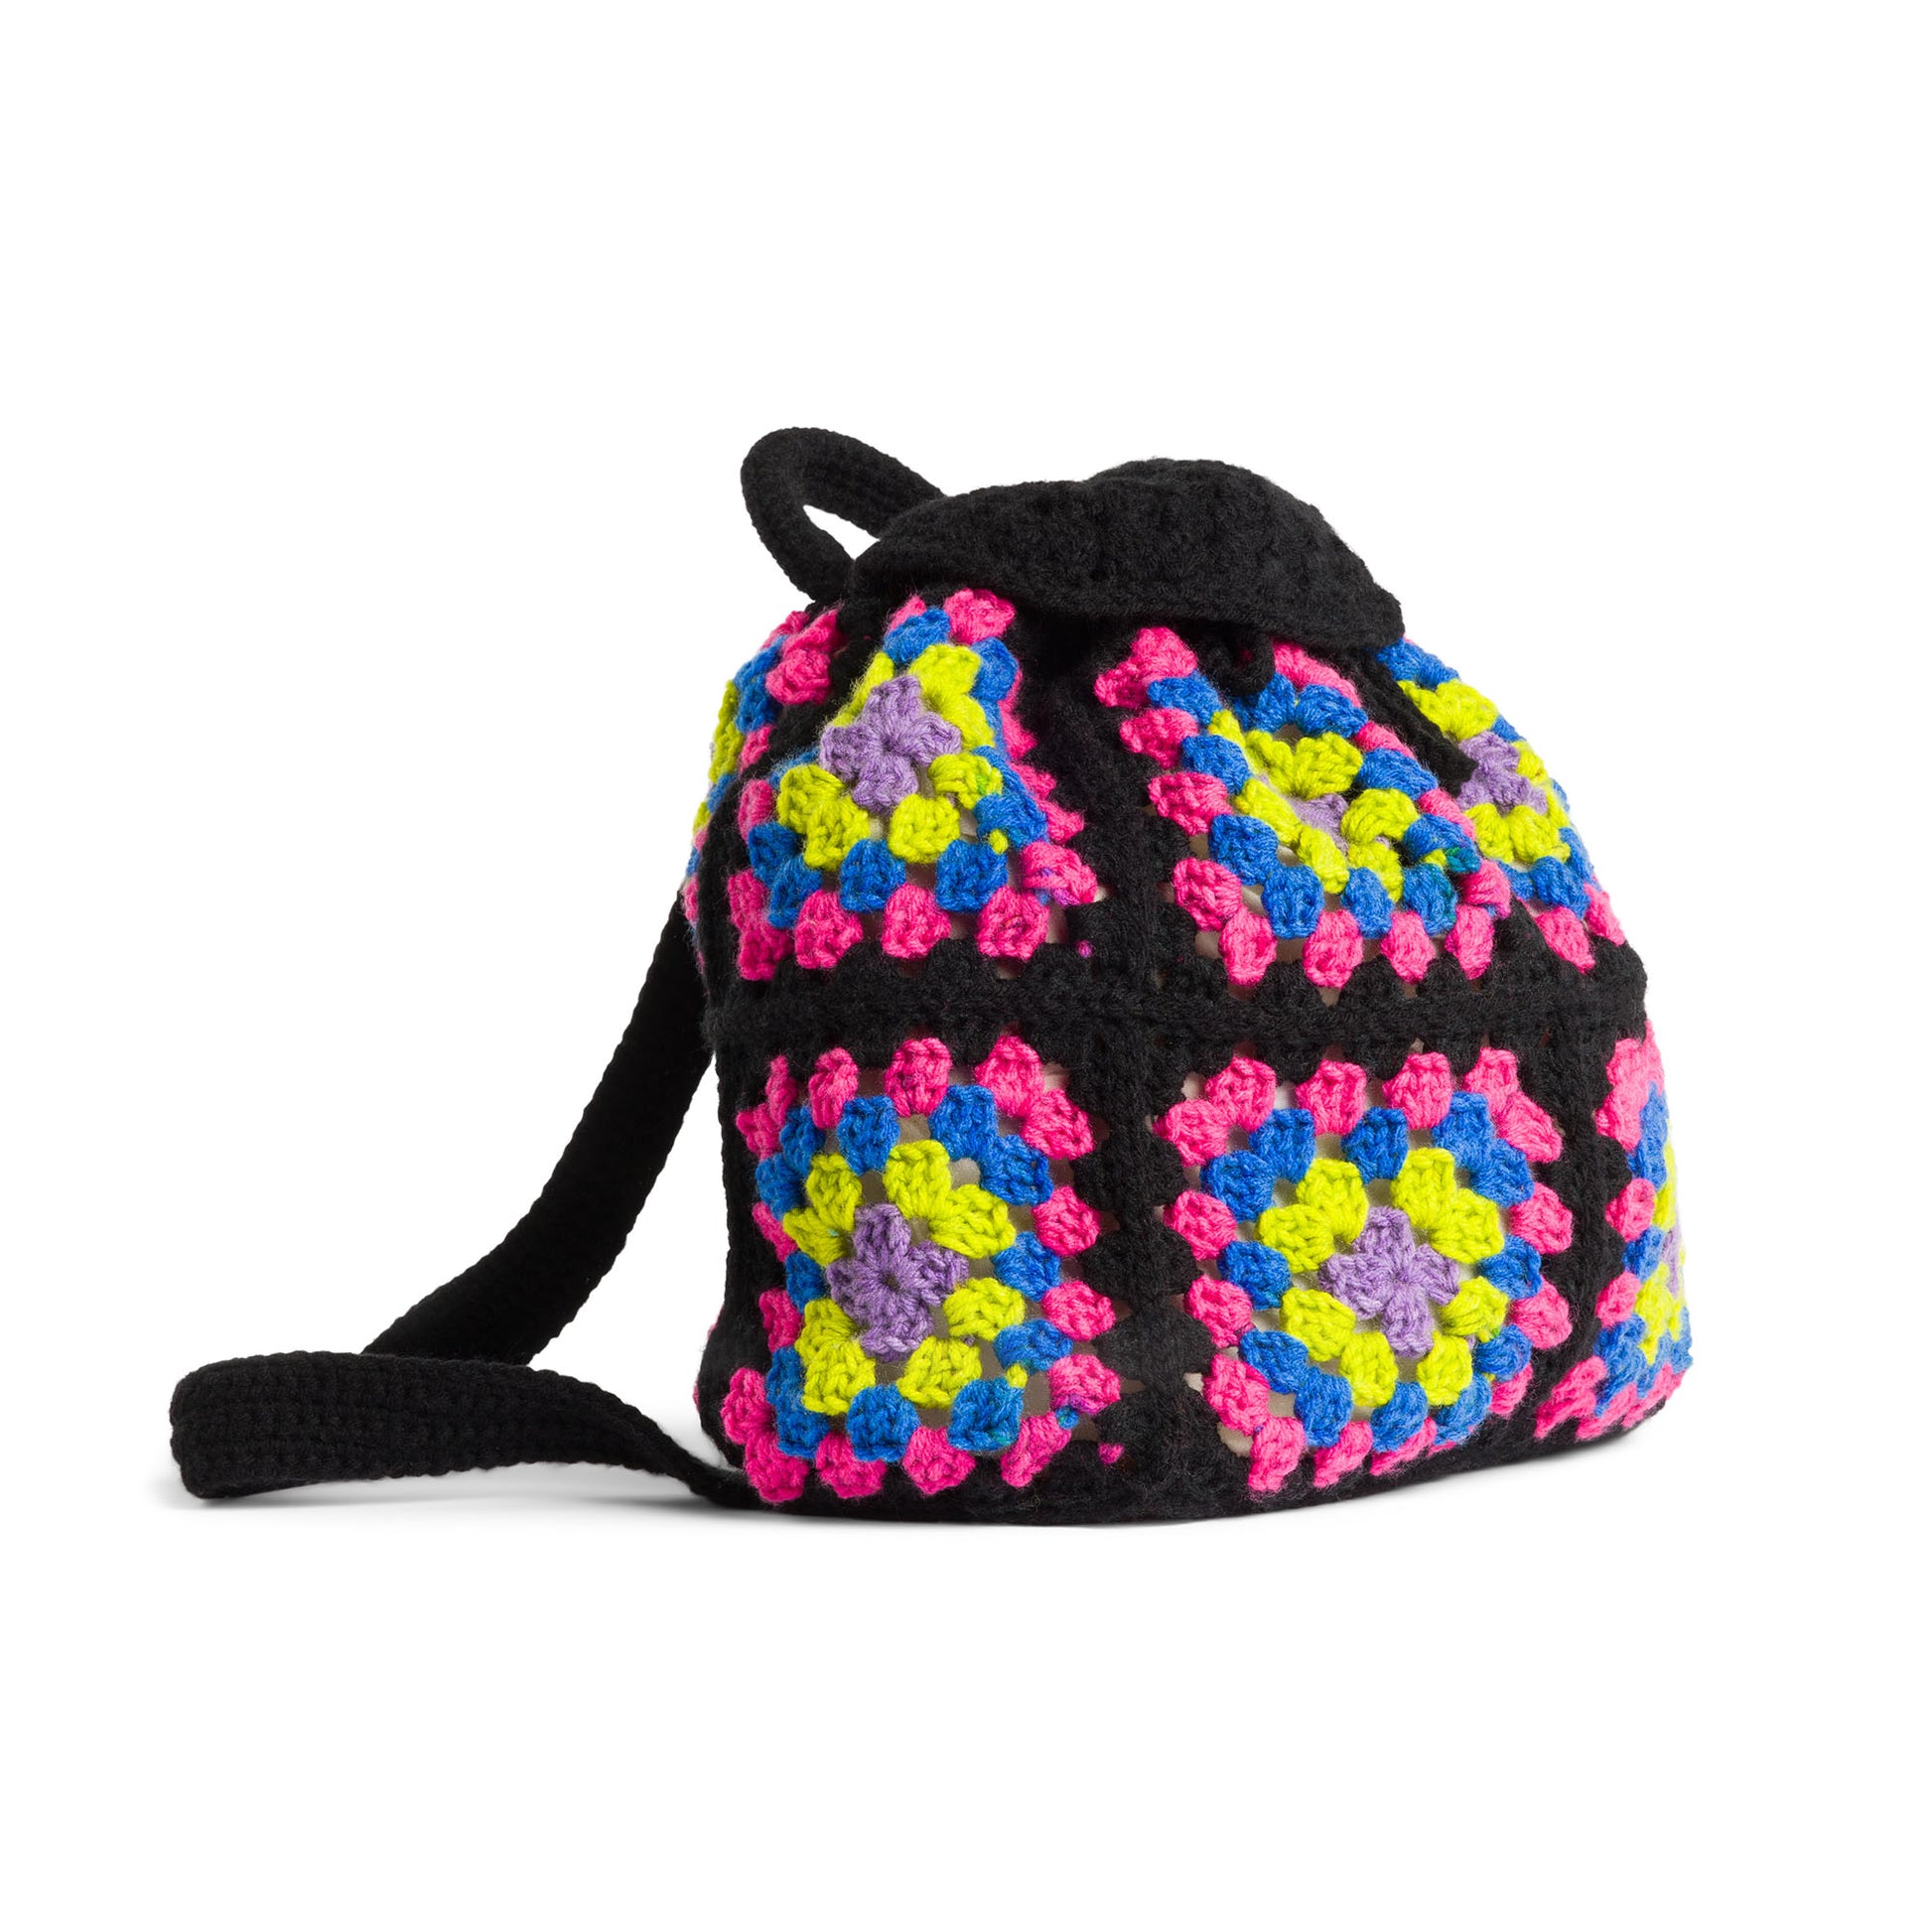
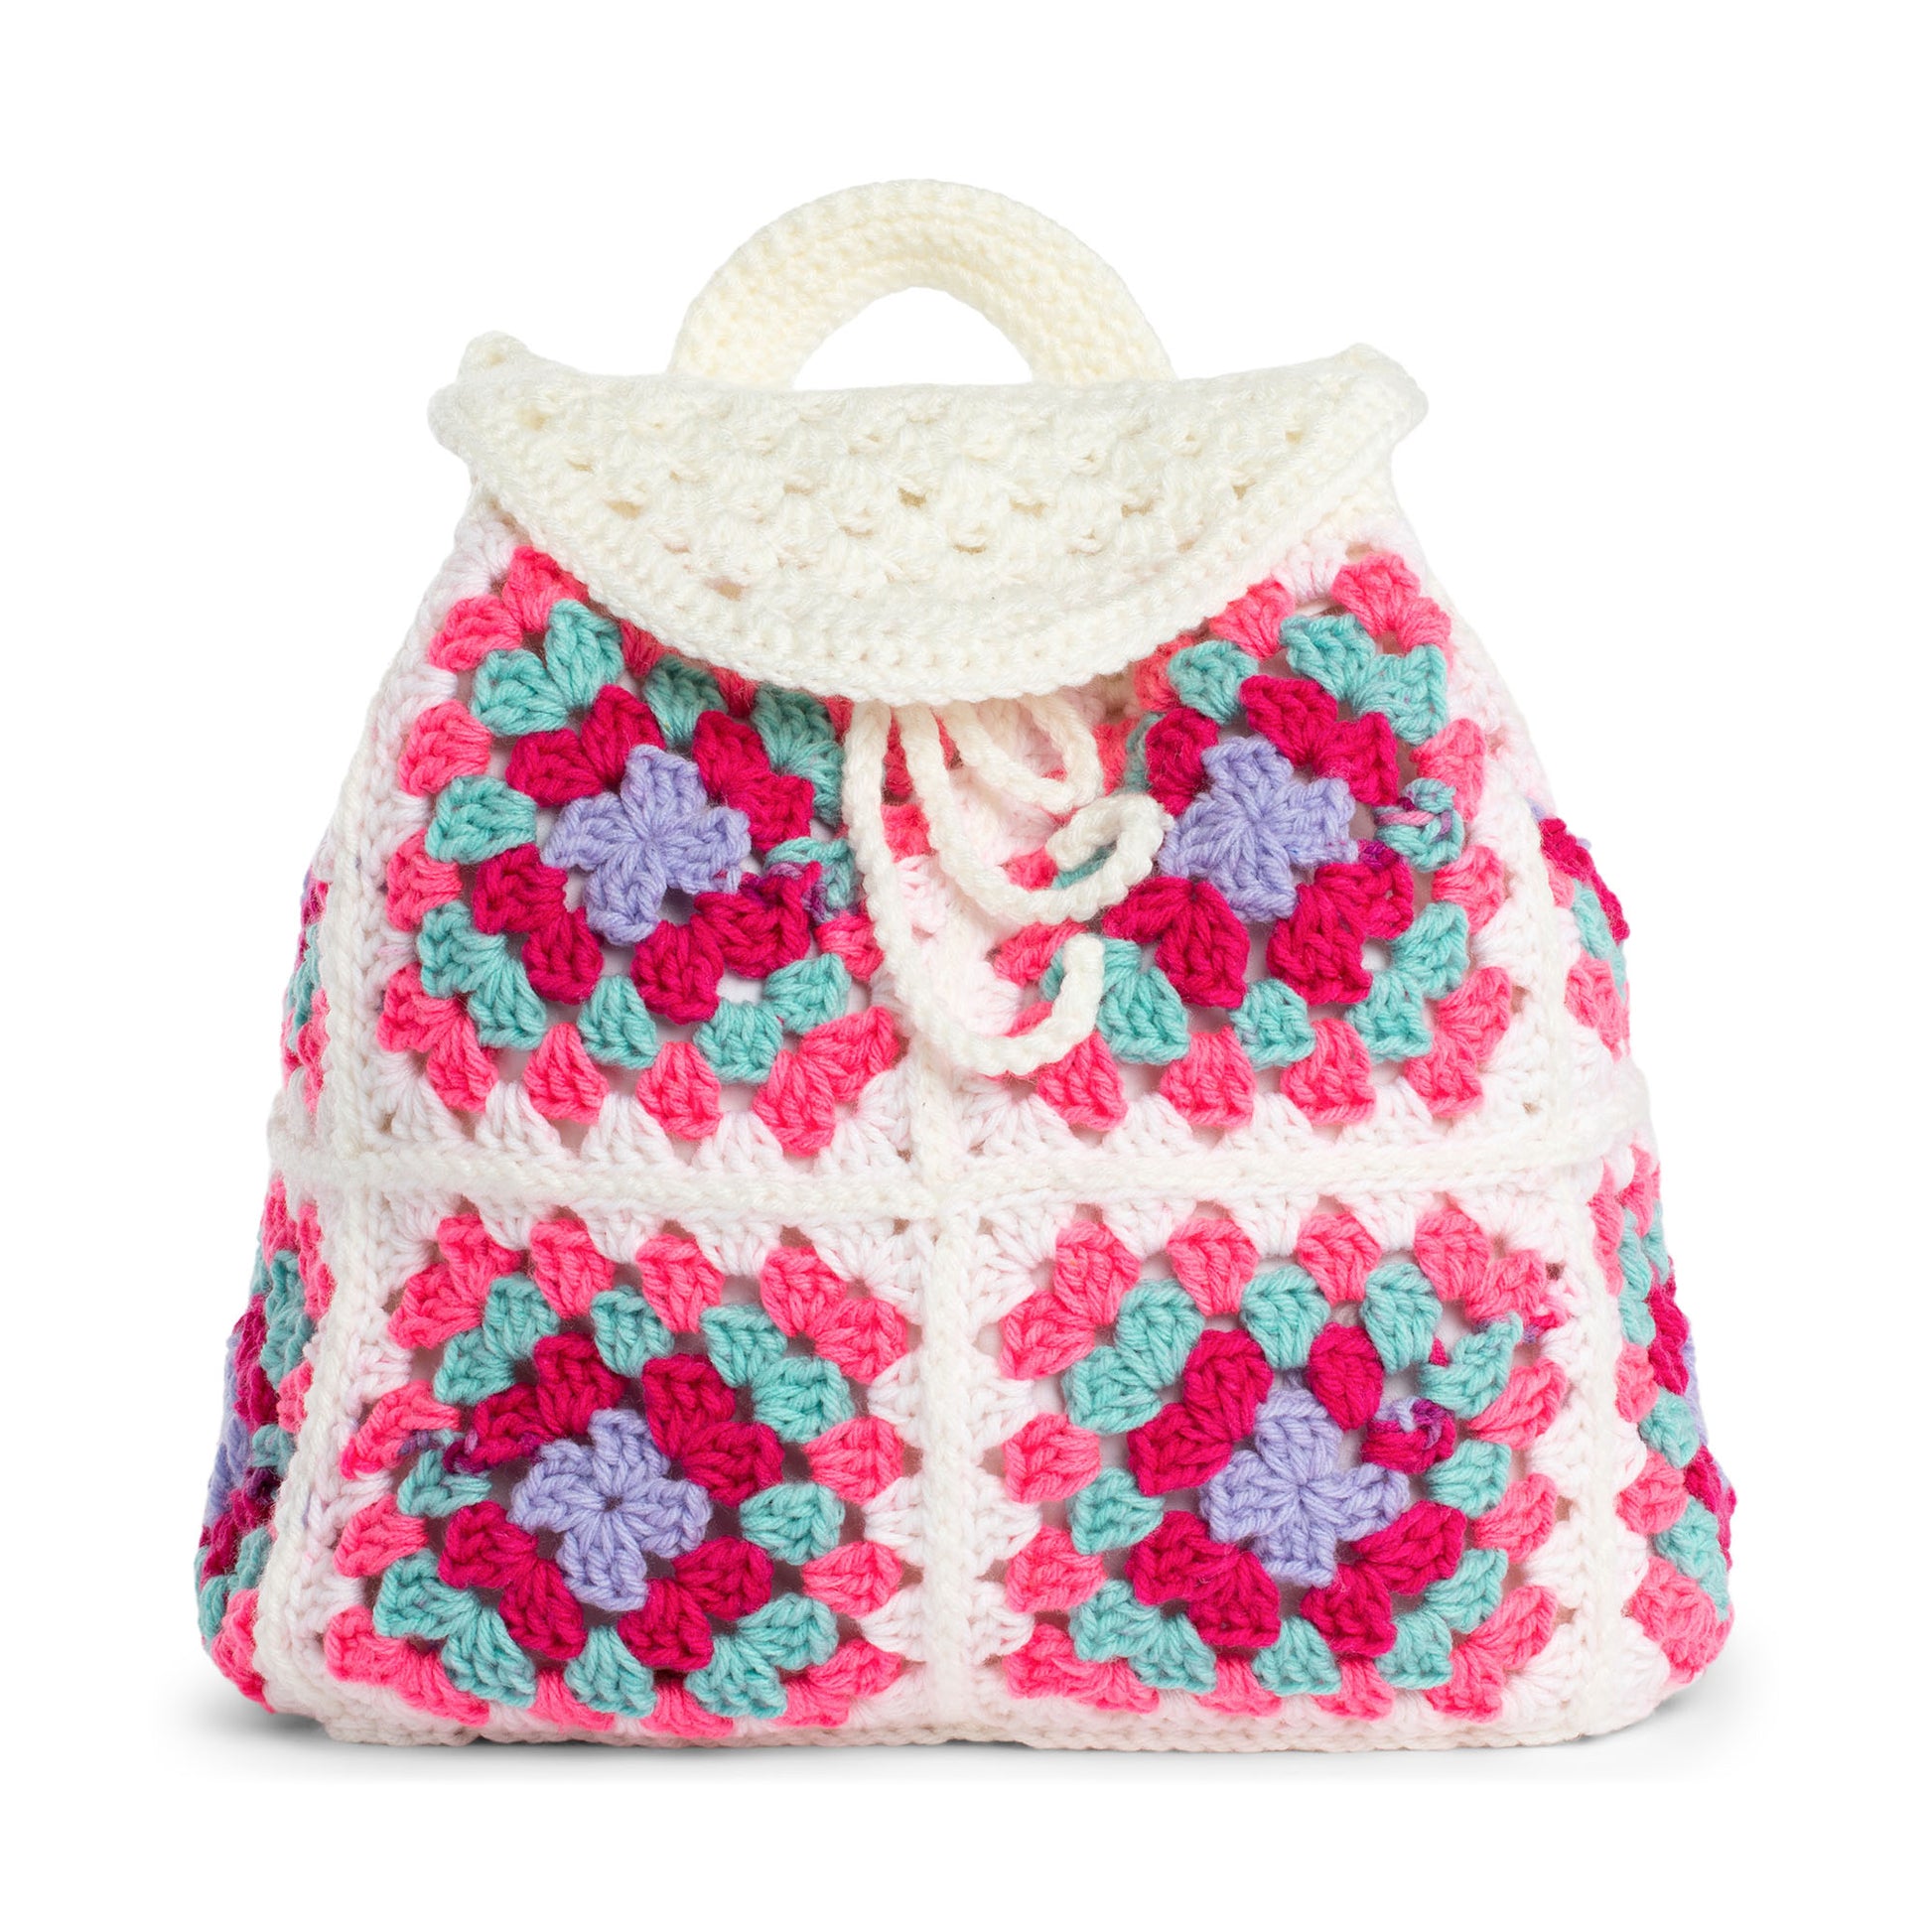
Free Red Heart Crochet Pack a Bunch Backpack Pattern, Rainbow Sherbet
Item# RHC0303-036512V
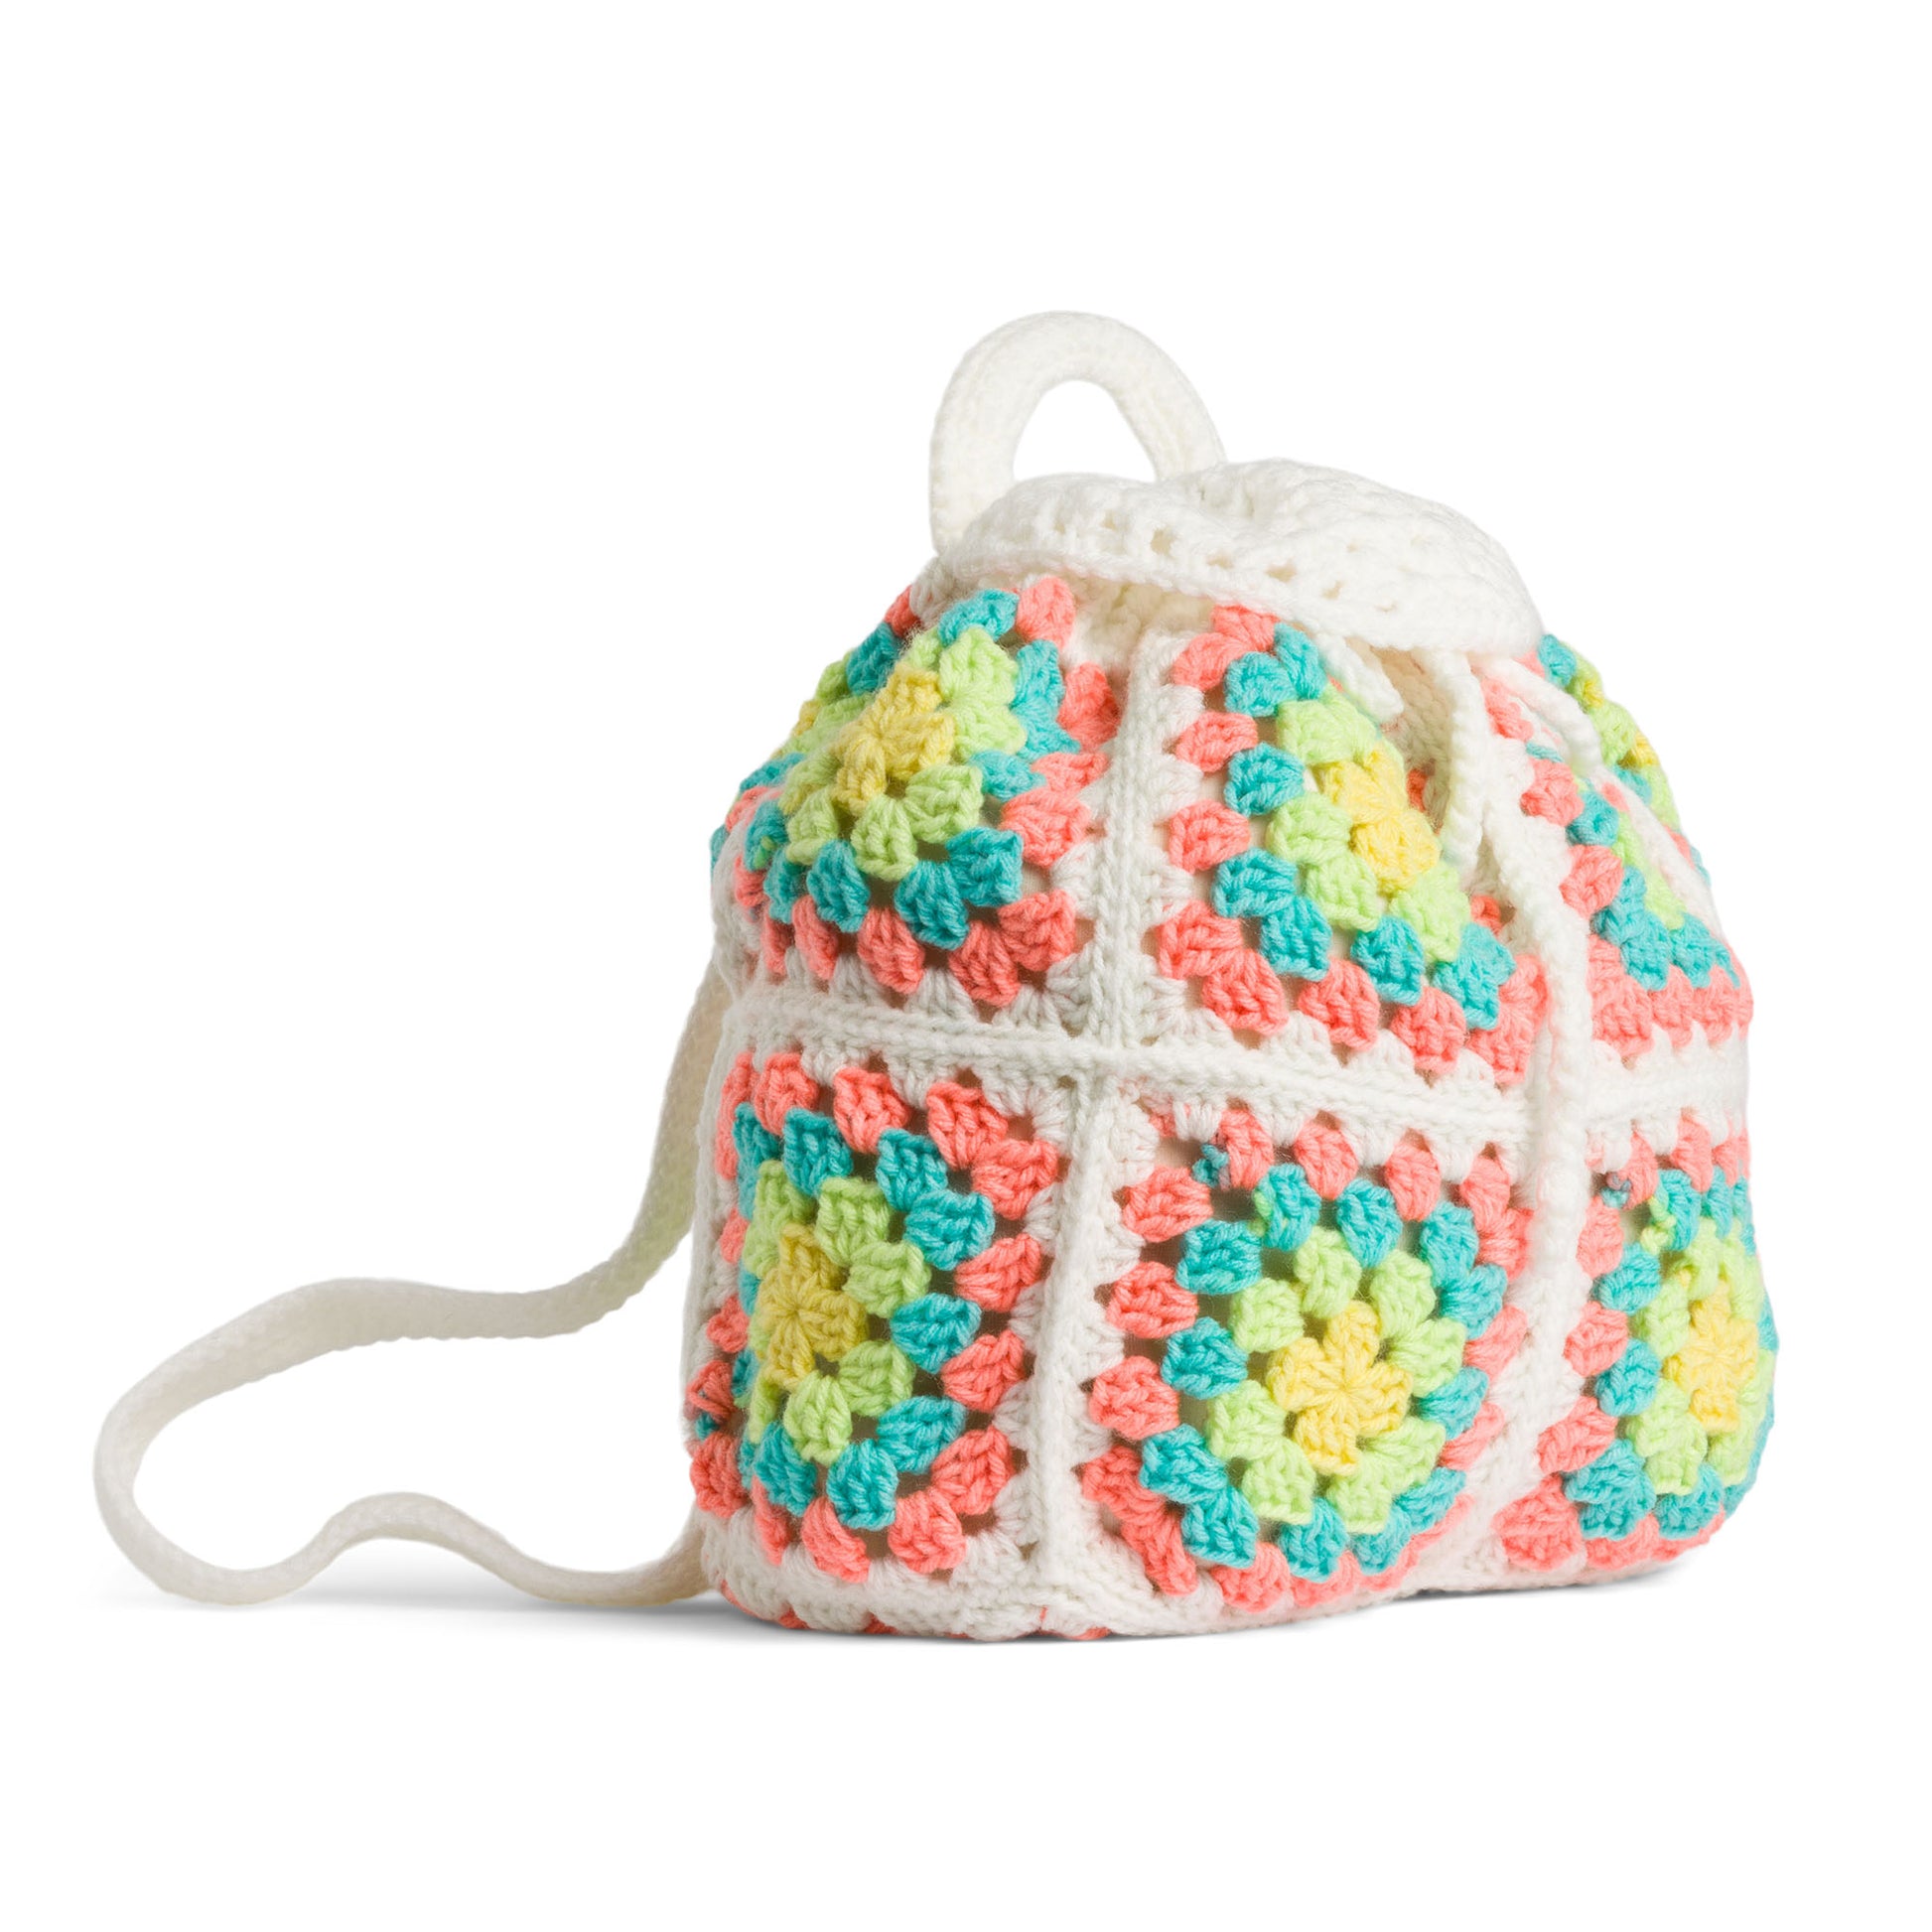
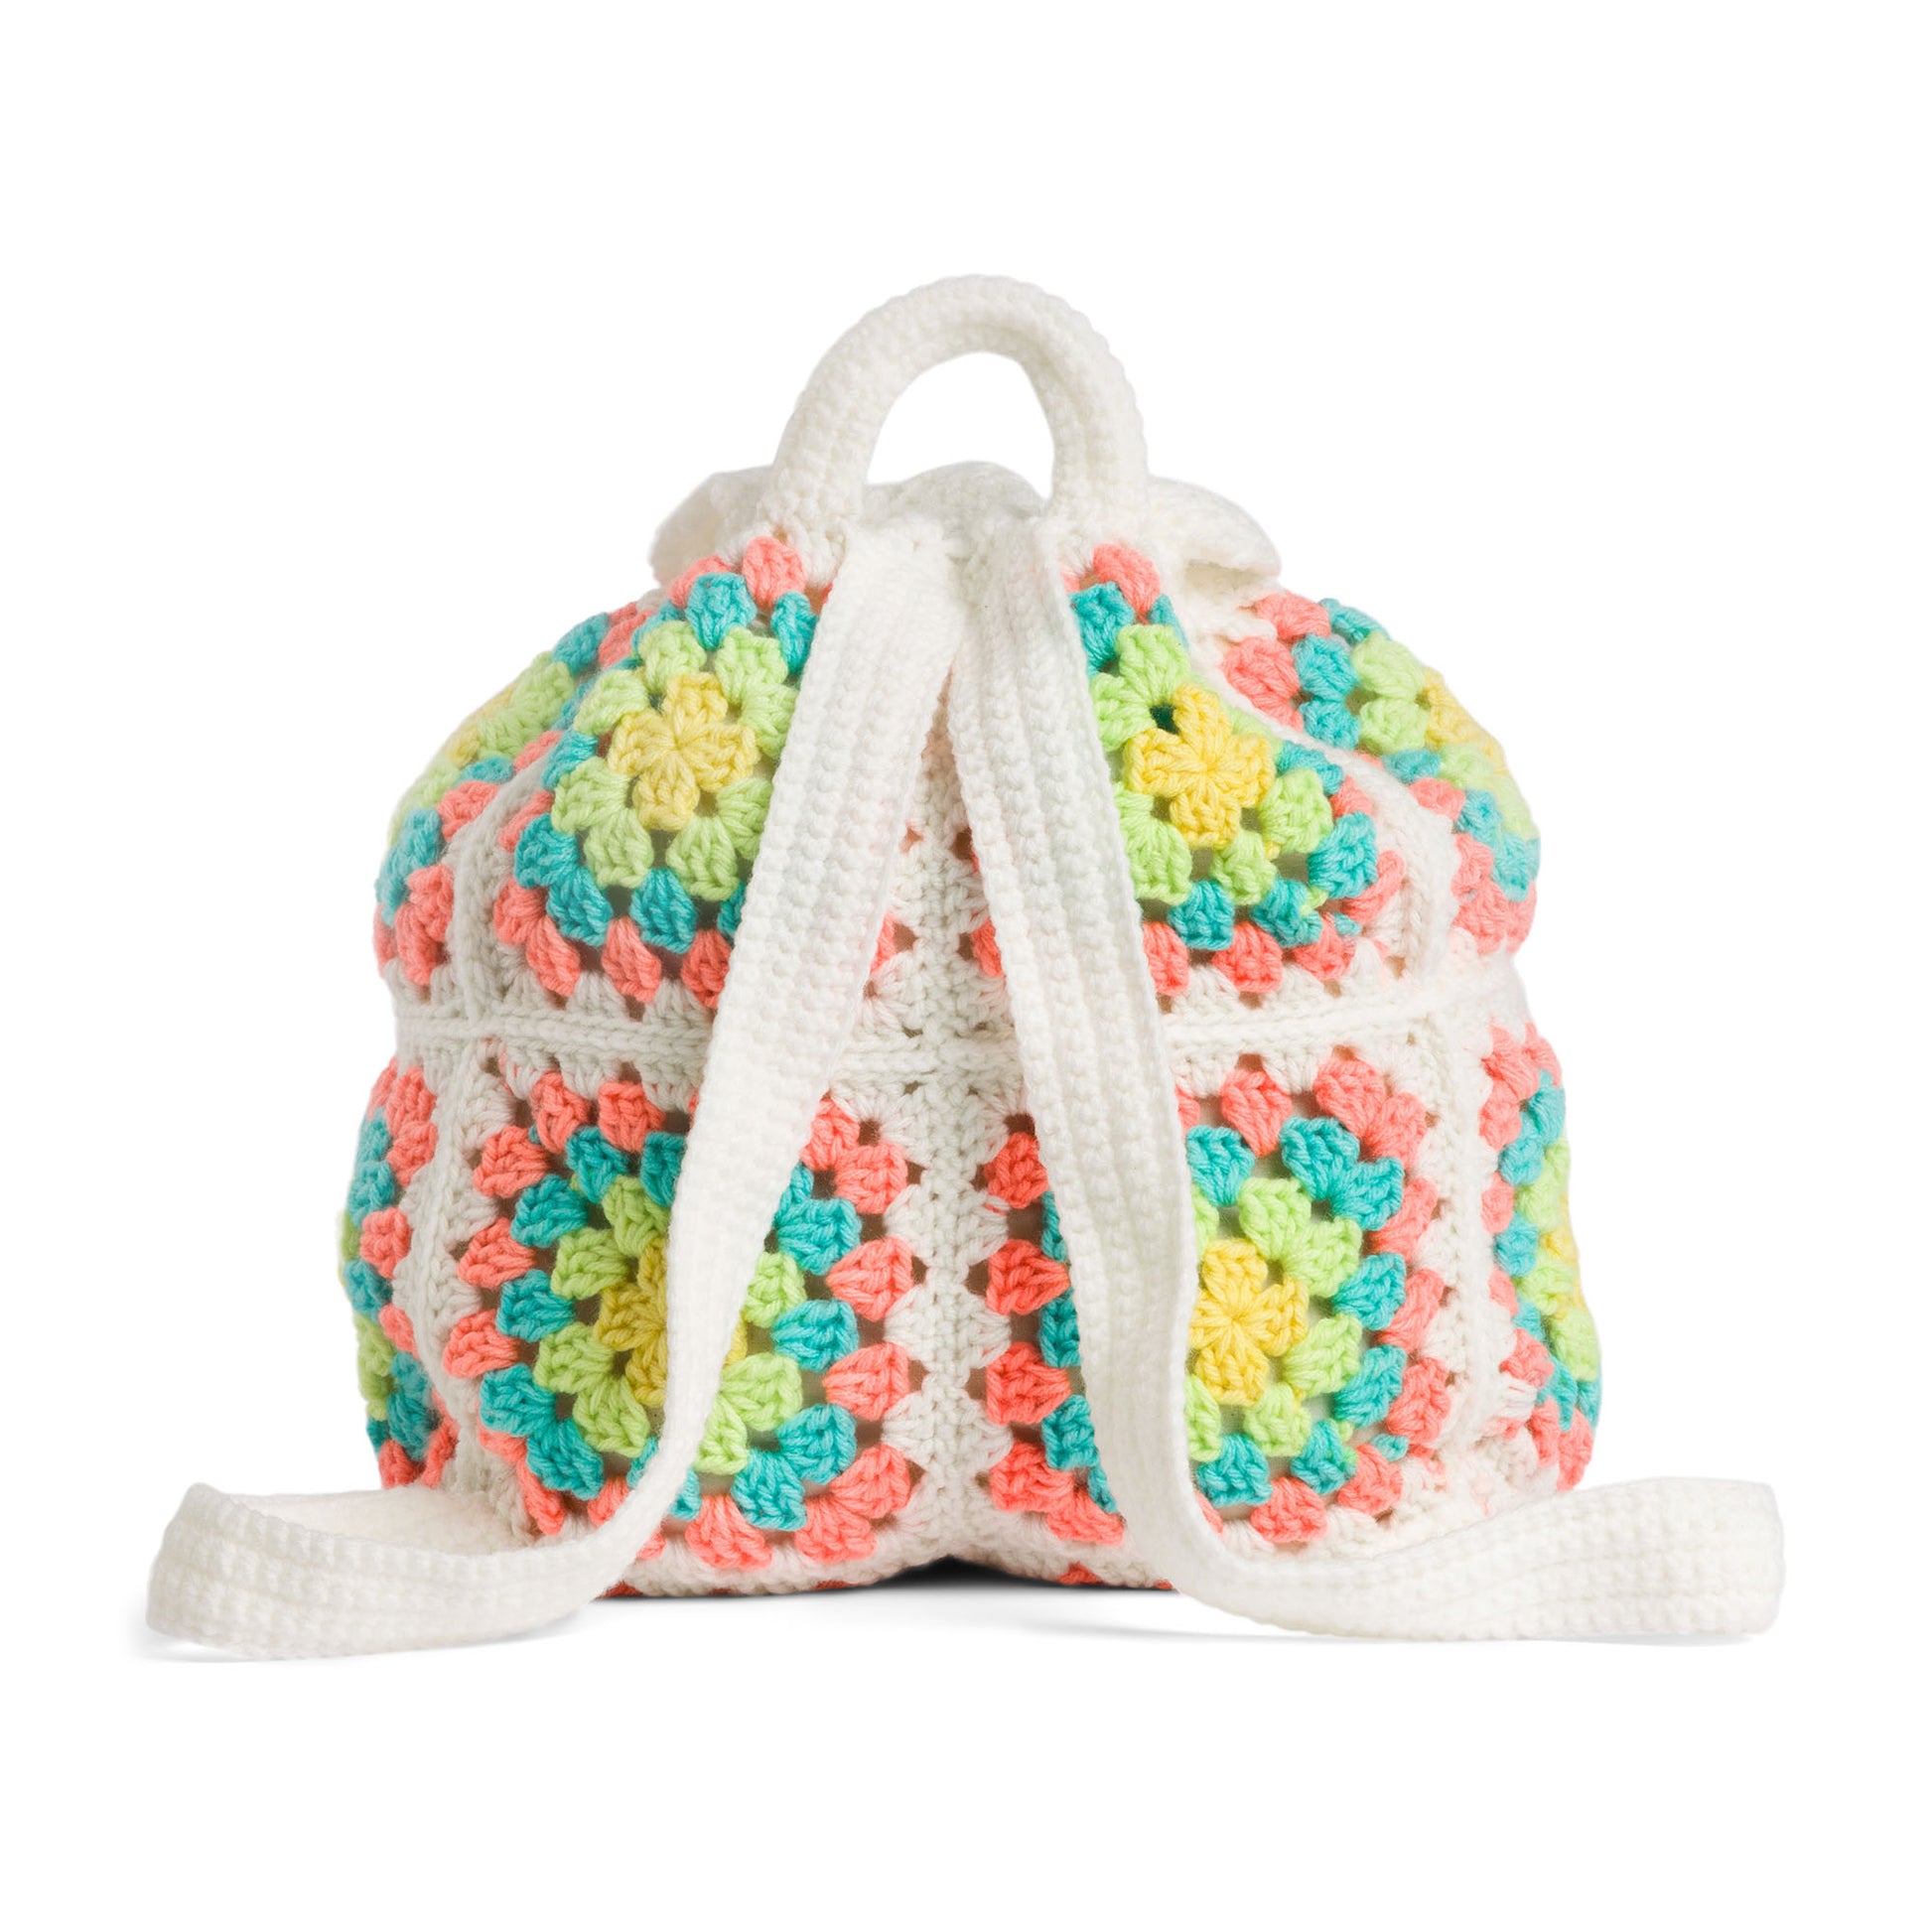
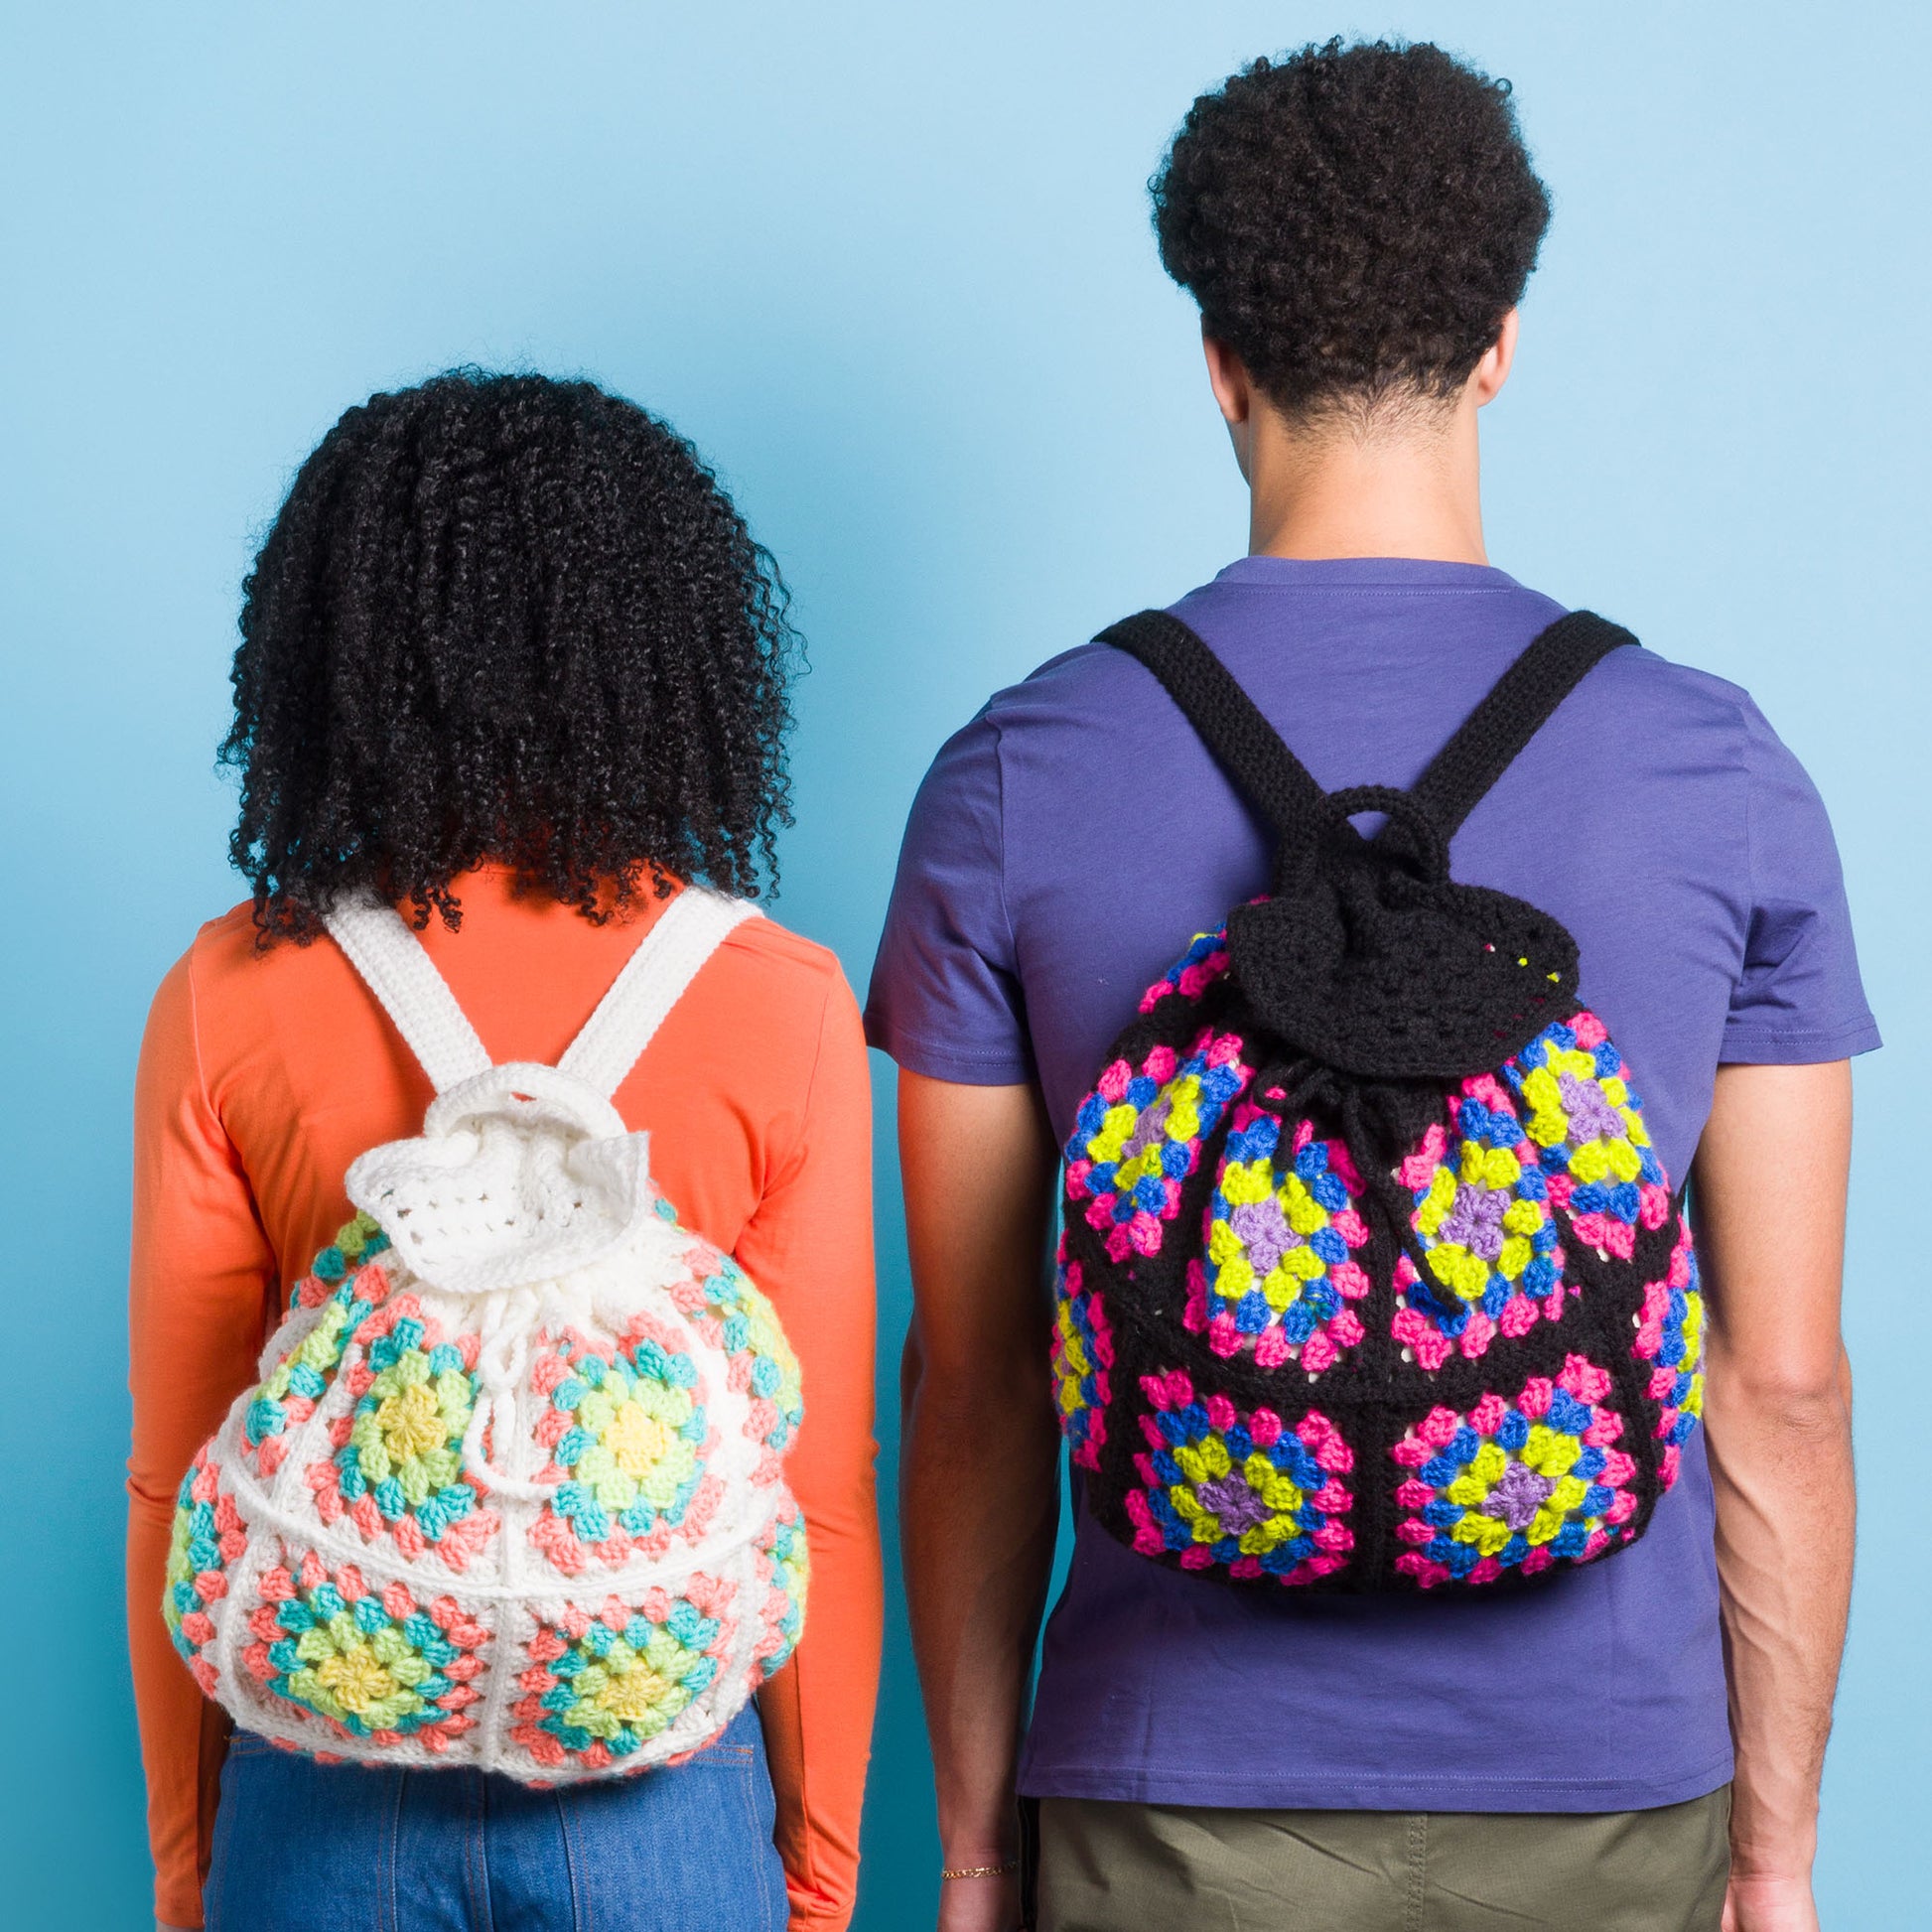
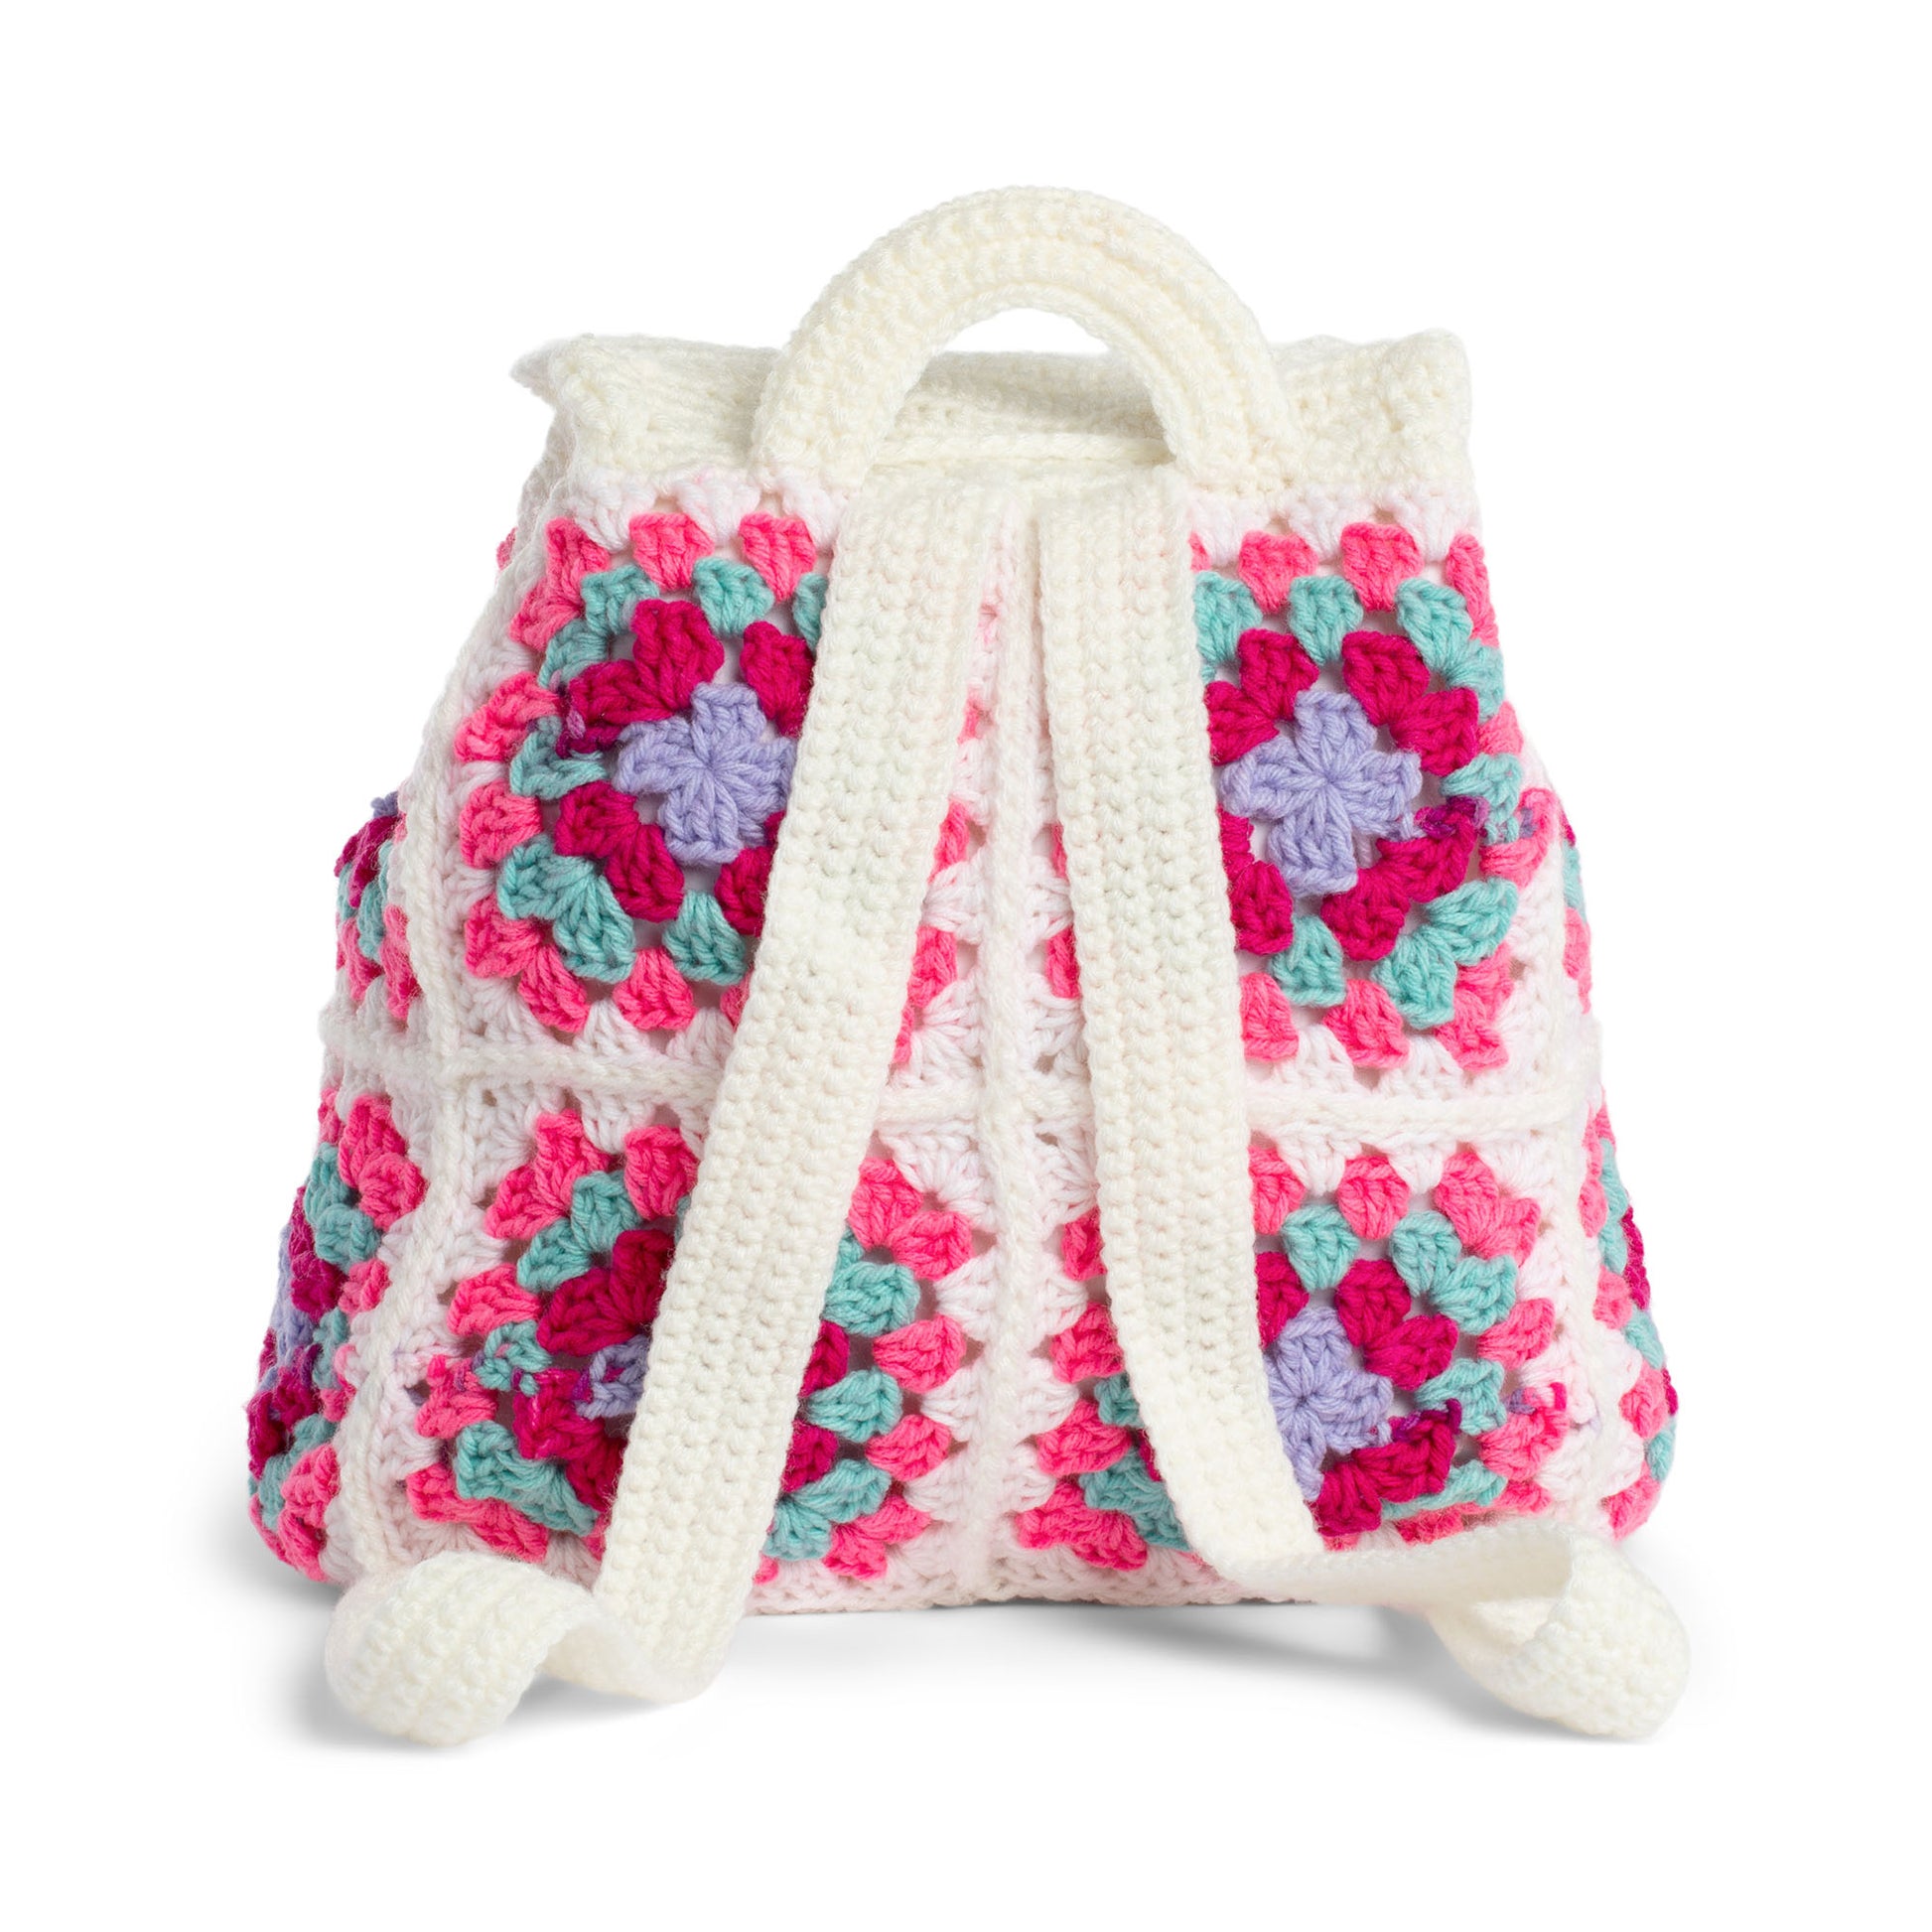
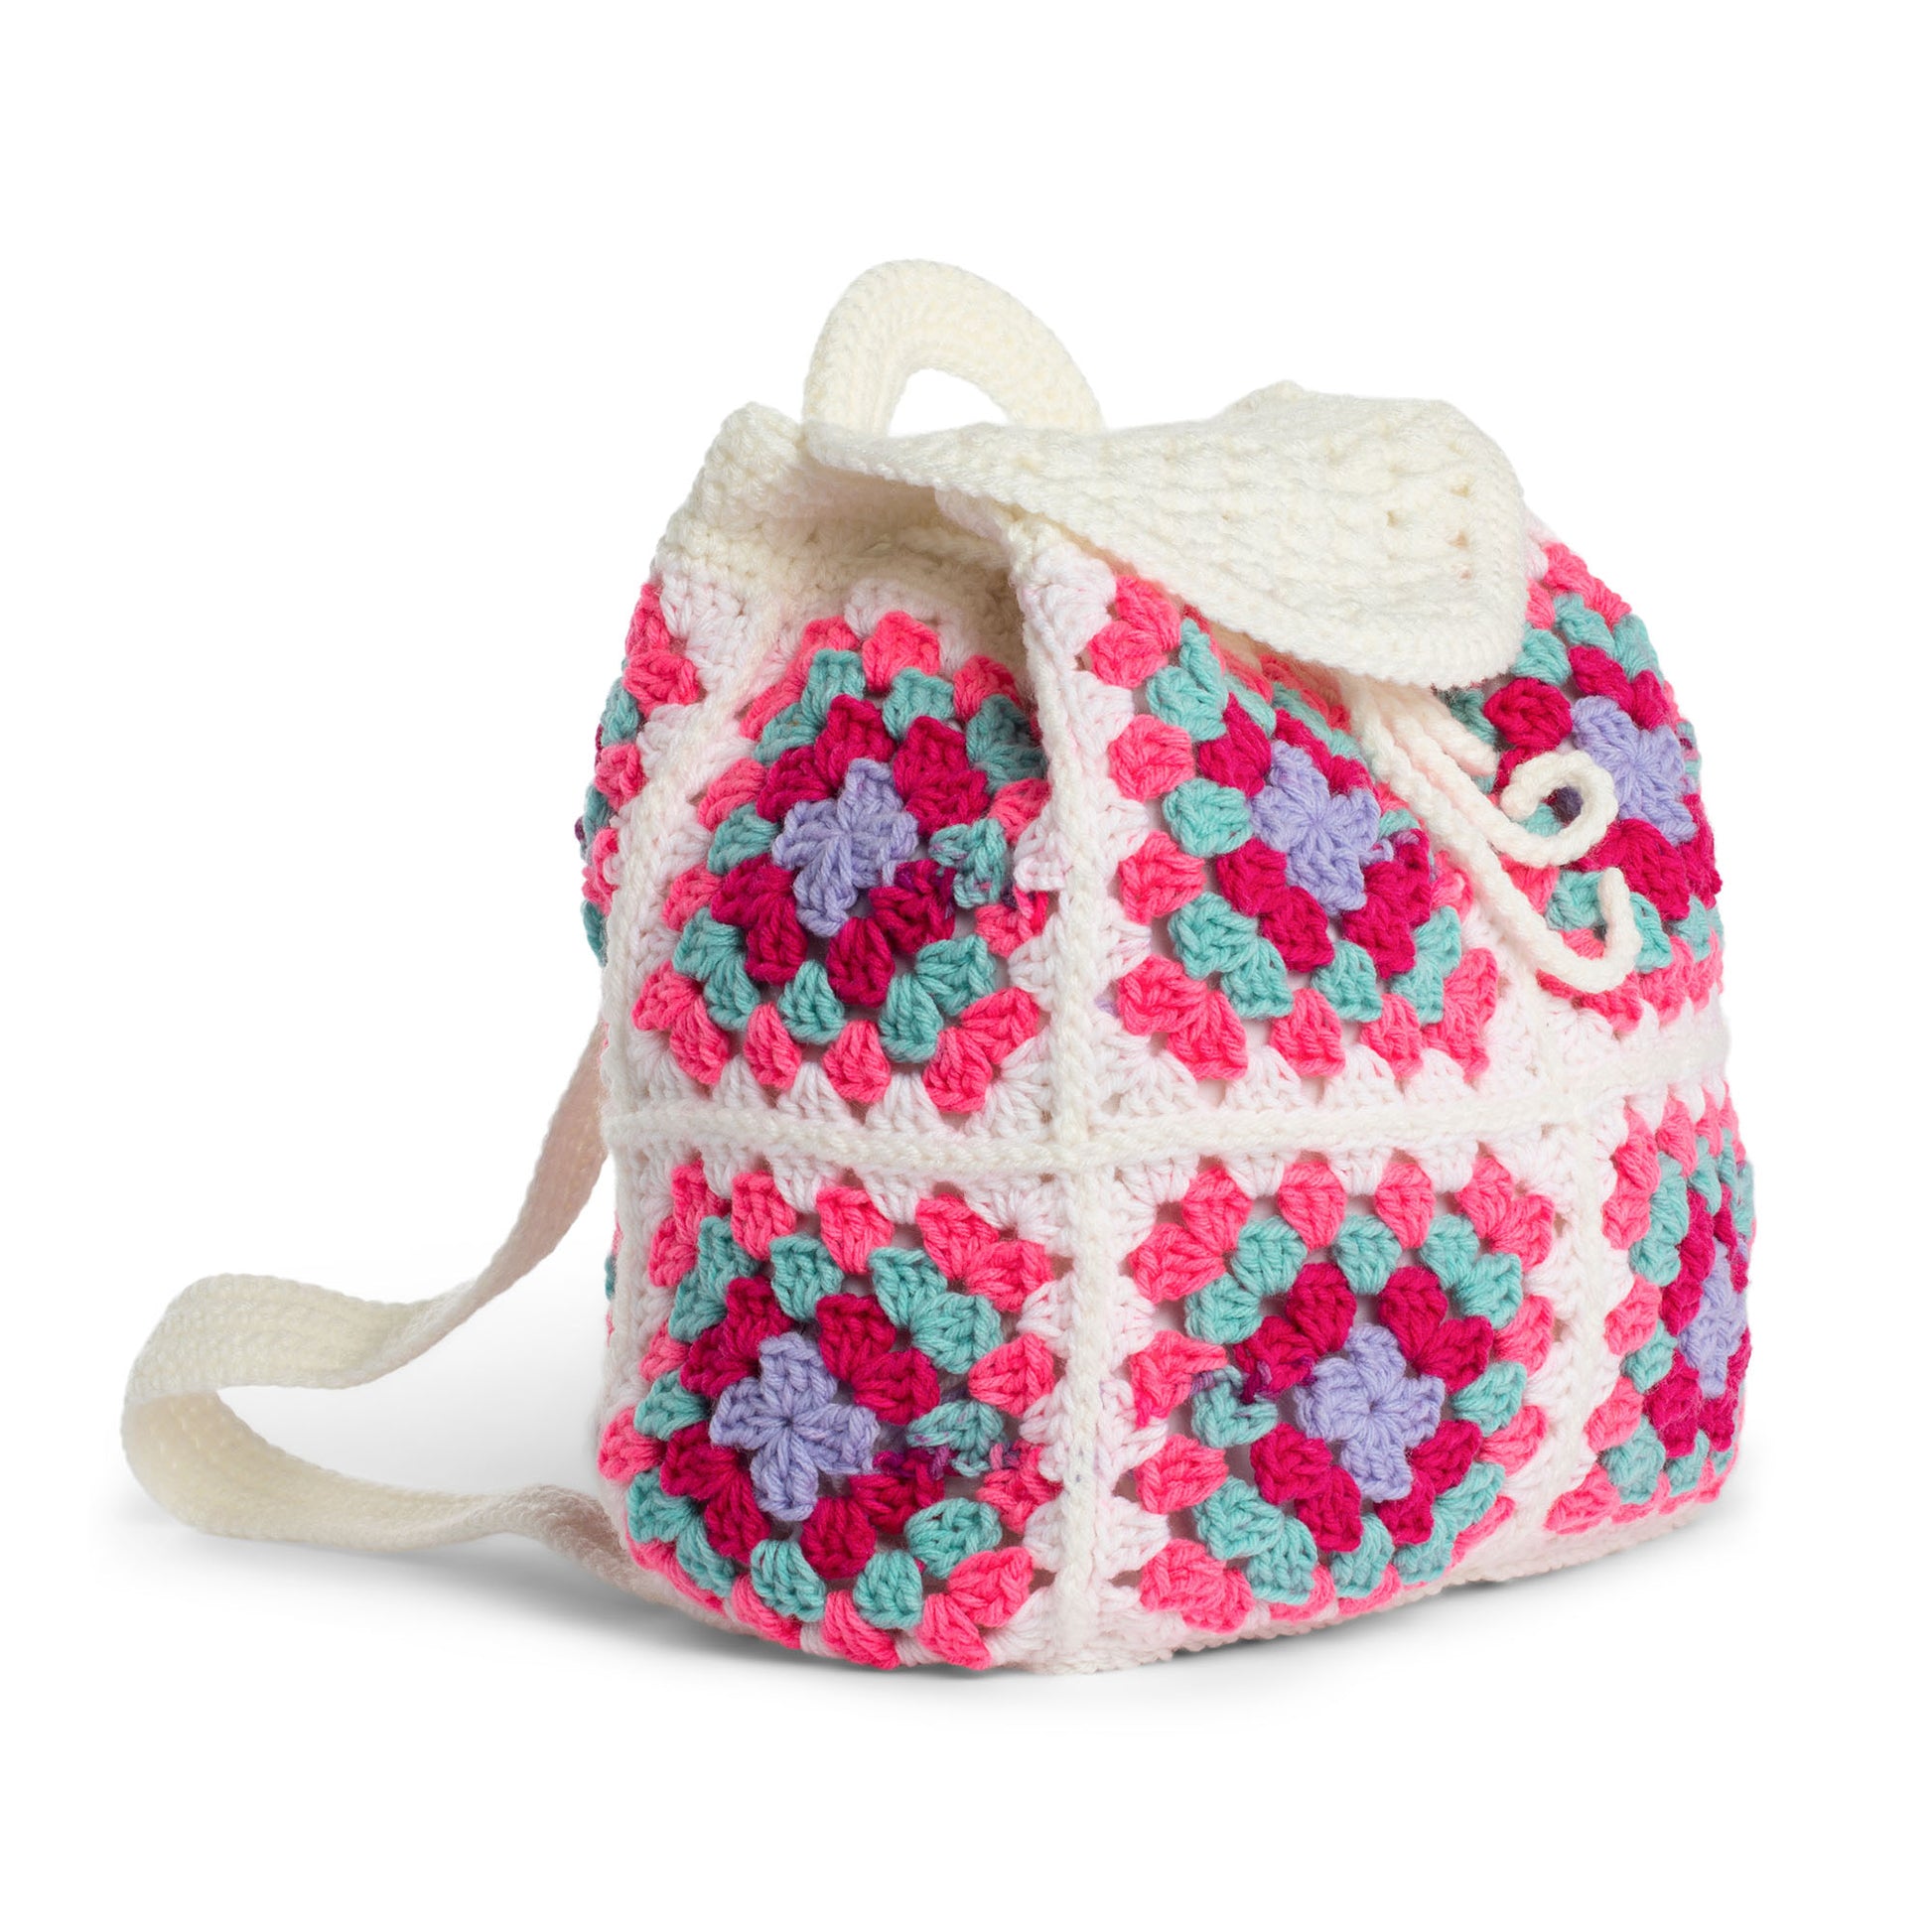
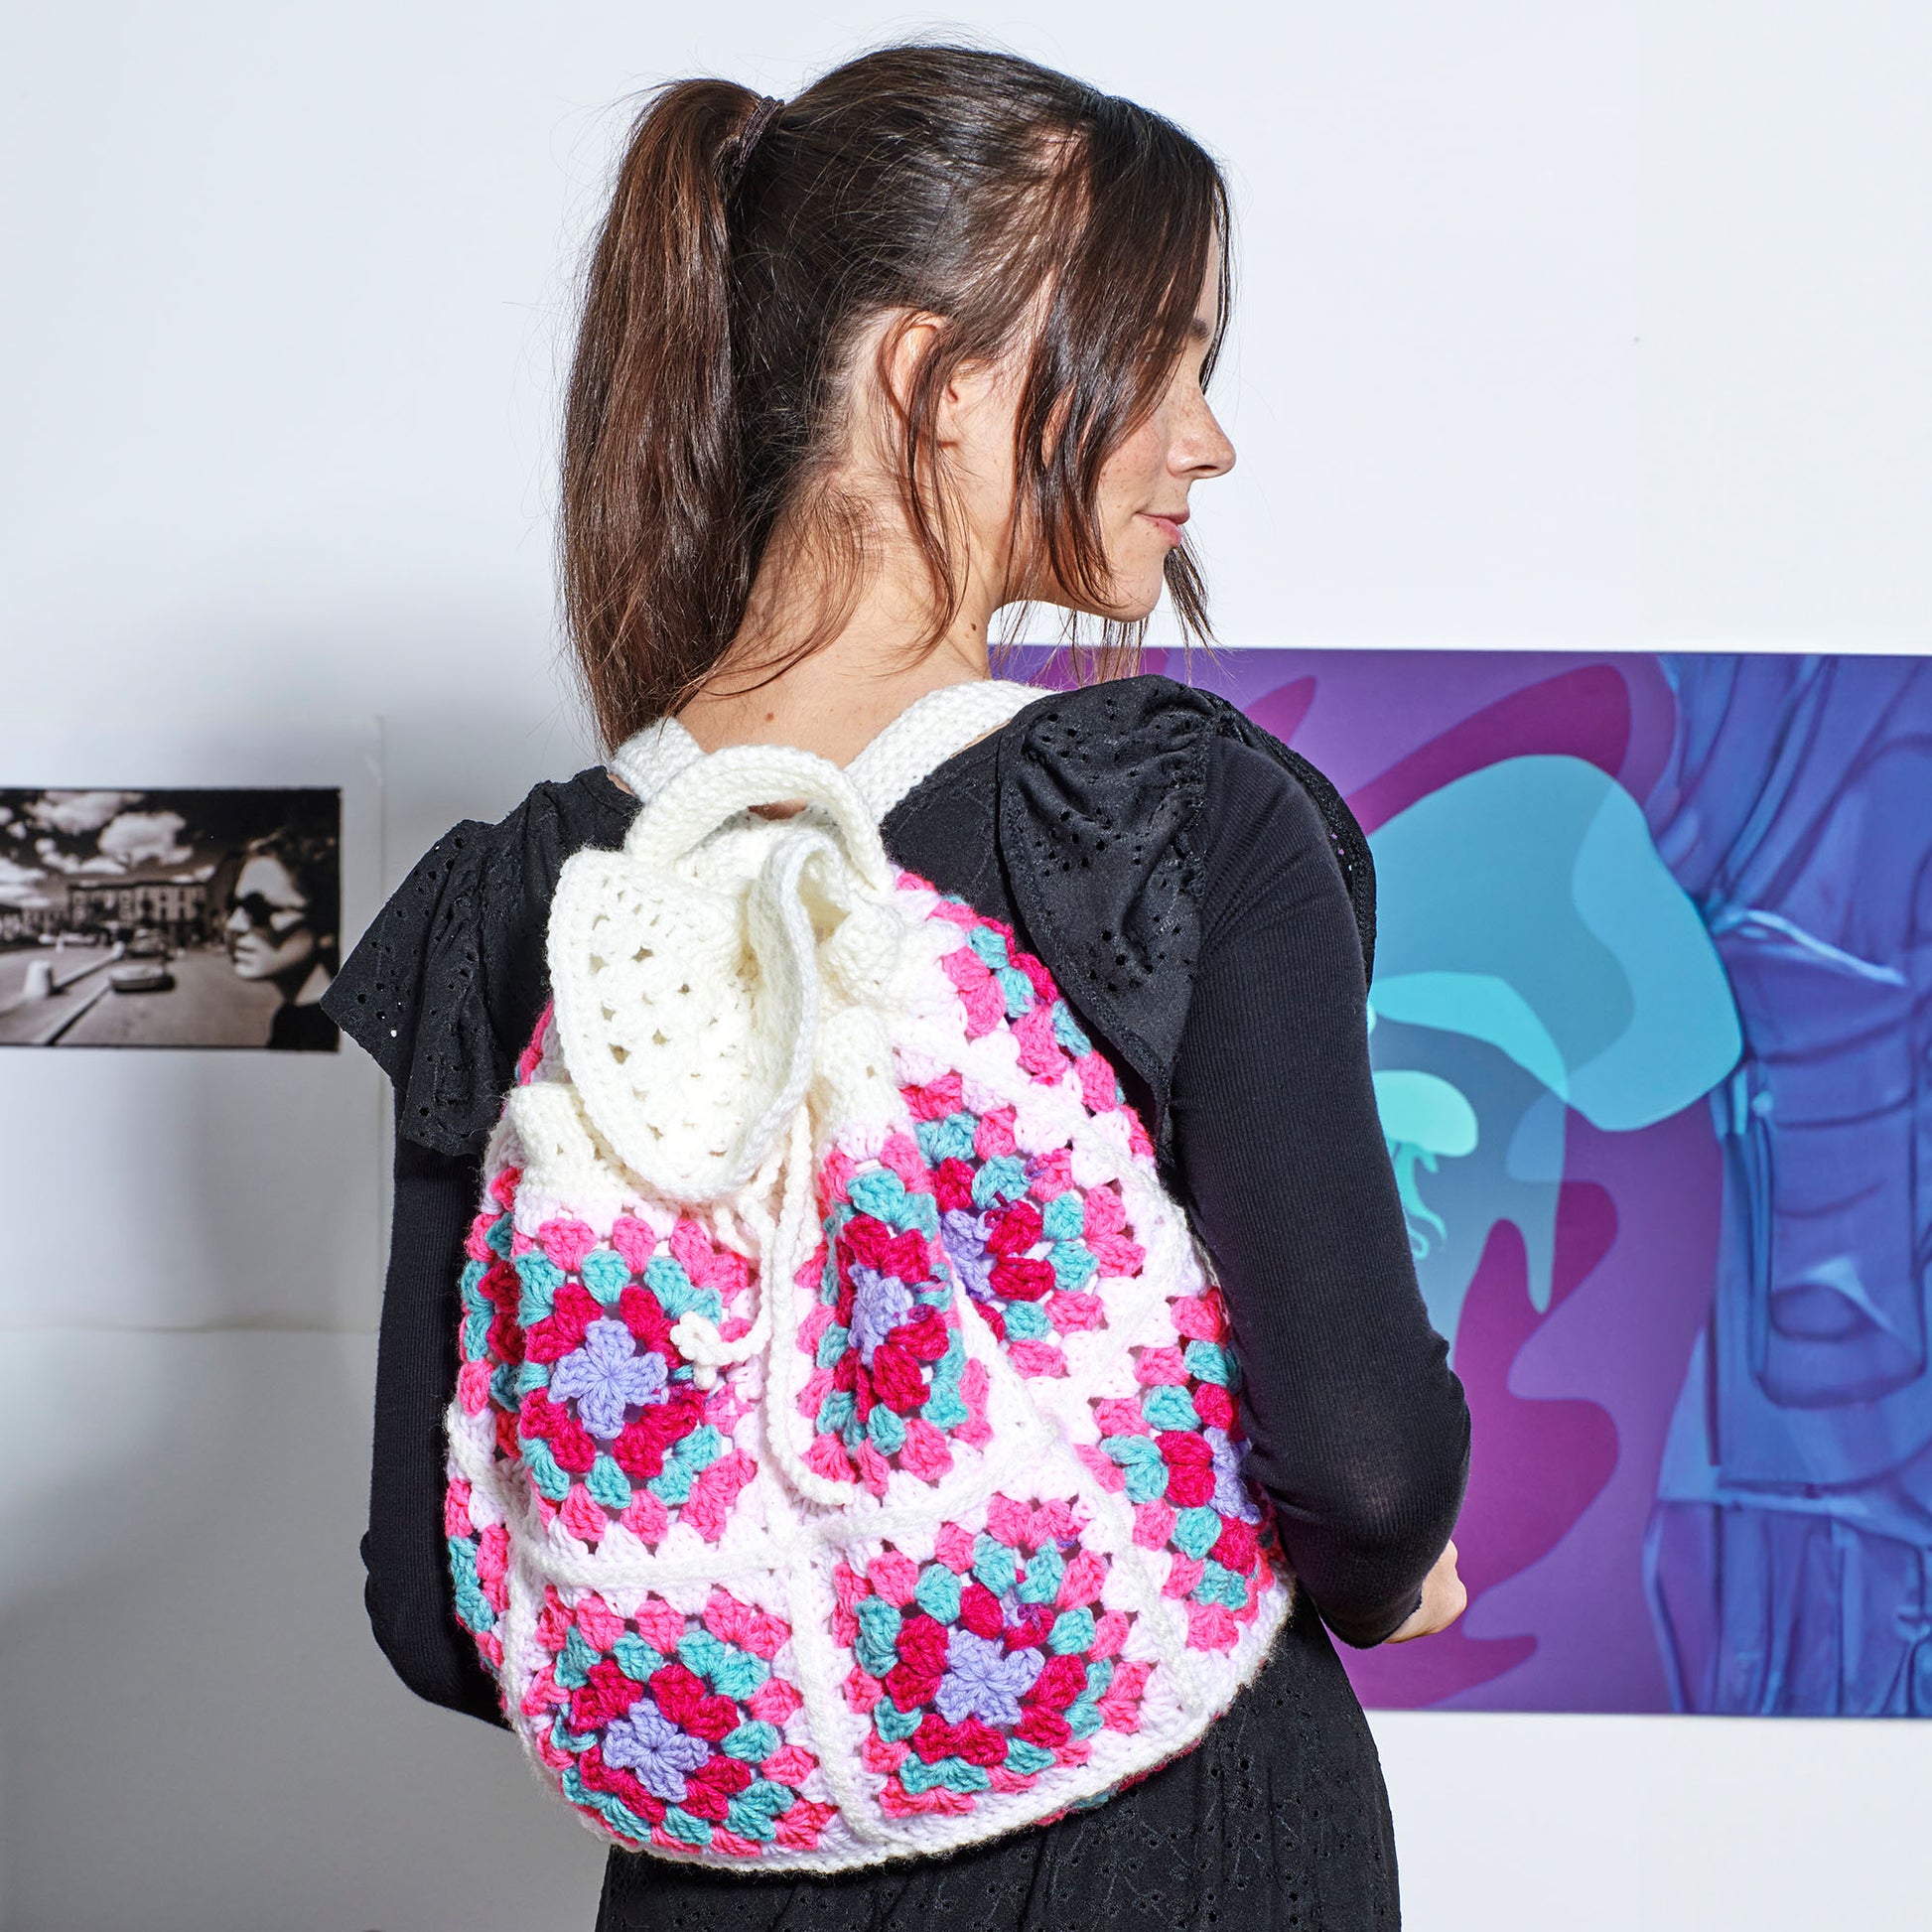
Effortlessly create this fun crochet backpack with Red Heart All in One Granny Square.
View full details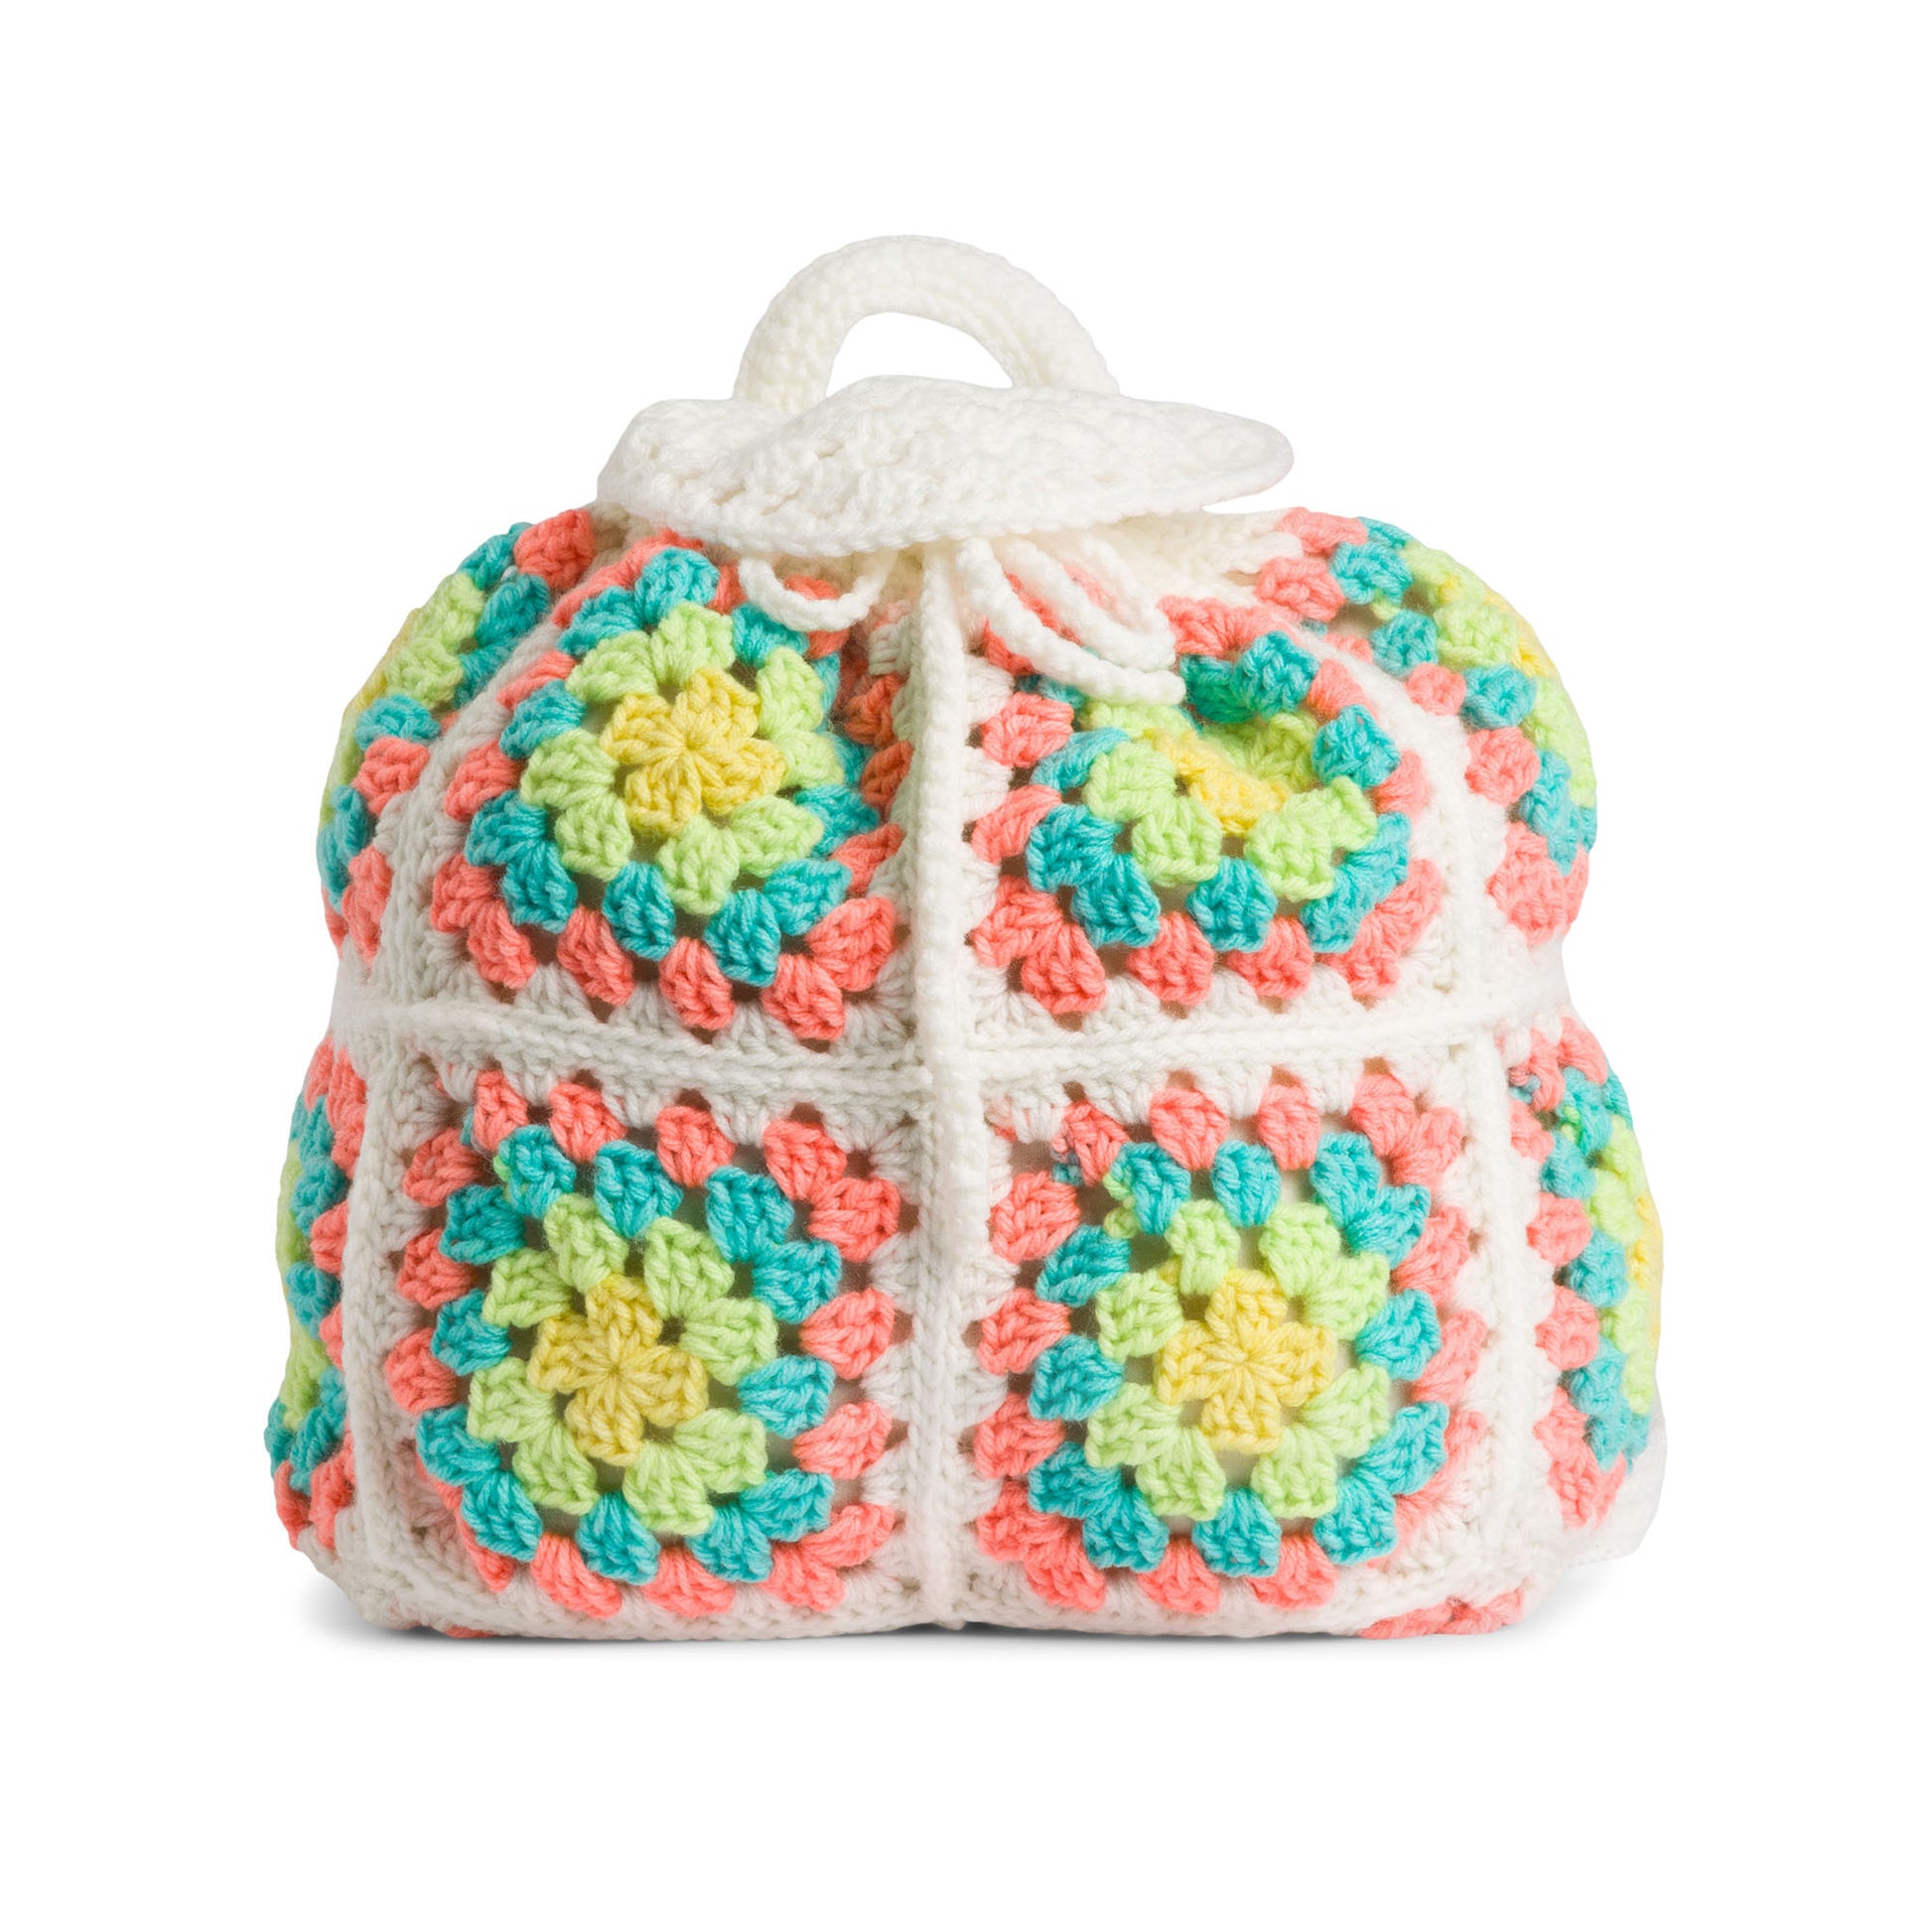


Free Red Heart Crochet Pack a Bunch Backpack Pattern, Rainbow Sherbet
Item# RHC0303-036512V
Effortlessly create this fun crochet backpack with Red Heart All in One Granny Square.
customize your pattern kit

Out of Stock
Hurry, only 833 left!
In stock
Out of Stock
Hurry, only 71566 left!
In stock
Out of Stock
Hurry, only 7830 left!
In stock
Out of Stock
Hurry, only 7880 left!
In stock
Out of Stock
Hurry, only 24561 left!
In stock

-
Description
Free Easy Crochet Bag/Purse Pattern for Women
It's never been easier to crochet a backpack with granny squares! Working with Red Heart All in One Granny Square, you'll first make 14 motifs, then join them together using a crocheted flat seam. Once the squares are in place, it all comes together with some rounds around the top to create a drawstring closure, a top flap, straps, and a handy hanging back loop. Practice chain, double crochet, single crochet, half double crochet, and more. It's great for students or as an anytime sack to carry all your on-the-go essentials.
Material Notes
Don’t forget to pick up the finishing touches for your project! Take a look at the list of supplies you’ll need that aren’t included in your kit.
Kit does not include:
- 2 large safety pins
- 2 pieces of medium-weight lining fabric 19” [48 cm] wide x 17” [43 cm] long
- Coats & Clark™ All Purpose Sewing Thread
- Tailor’s chalk
- Straight pins
- Sewing needle
- Sewing machine
-
Sizing Notes
Sizing Notes
Making the right size is important! To make sure your project turns out the size described, always make a gauge swatch to match your tension. First time swatching? Learn more about crocheting a gauge swatch!
Finished Measurements
- Approx 14" [35.5 cm] tall x 12" [30.5 cm] wide, excluding handle and straps.
-
Care
Pattern Care
Treat your finished project right! Make sure you read the care directions closely so your hard work ages gracefully.
- Wash Hot
- Non-Chlorine Bleach
- No Tumble Dry
- Hot Iron, Prof.
- Dry Clean: Normal
WATCH THE VIDEO!
-
Reviews & Ratings
Reviews
Average Ratings
Quality of Product, 4.2 out of 5Value of Product, 3.8 out of 5Filter Reviews
RatingLocale1 to 5 of 5 Reviews1 – 5 of 5 ReviewsHighest to Lowest RatingAnonymous5 out of 5 stars.So Cute and Easy!
a month agoI actually had a bunch of granny squares lying around and made this with those. Mine didn't turn out as big because of that, but I loved it. I need some practice stitching the squares together, but that is no fault of the pattern.Yes, I recommend this product.
Helpful?Quality of Product, 5.0 out of 5Value of Product, 5.0 out of 5- Received Free Product
Tucson, az5 out of 5 stars.Easy, quick, and so cute!
- Received Free Product
9 months agoThis bag is so cute! I finished it in about two weeks working on it here and there. Very clear instructions and easy to follow. My daughter loved it! I love this all in one yarn and all these great patterns. Thank you!Yes, I recommend this product.
Helpful?Quality of Product, 5.0 out of 5Value of Product, 5.0 out of 5Hegewisch5 out of 5 stars.Quck and Easy!
a year agoIt's great to see this pattern AGAIN! I made this exact bag from the original Simplicity 9695 pattern in 1971 and it was easy even back then, when you had to change colors to make Granny's, but so much easier now using the ALL IN ONE Yarns which I LOVE and makes it sooo much quicker and easier to make! Please keep bringing more Color combinations. THANK YOU!Yes, I recommend this product.
Helpful?Quality of Product, 5.0 out of 5Value of Product, 3.0 out of 5Arizona5 out of 5 stars.Fun pattern
a year agoI used this pattern to make an all brown version for my aunties upcoming birthday. It came out so cute! I will definitely be using this patter again in the future! ❤️🥰Helpful?Quality of Product, 5.0 out of 5Value of Product, 5.0 out of 5canada1 out of 5 stars.Great pattern until the flap. Poorly Written.
a year agoThe pattern is good and clear until you get to crocheting the flap. That section is awful, there is no way to get down to 6 then 5 clusters based on the instructions. Disappointing.No, I do not recommend this product.
Helpful?Quality of Product, 1.0 out of 5Value of Product, 1.0 out of 5Response from Yarnspirations:a year agoConsumer CareWe are sorry to hear you you found the flap instructions difficult to follow on the Pack a Bunch Backpack. Below the instructions is a schematic to help you visualize how the decreases are made. In short, fewer clusters are created in subsequent rows by only working between existing clusters. Chains at the beginning of the row and a double crochet at the end create a smooth edge as you move from row to row. Also, care must be taken to make sure you are skipping the right number of stitches or clusters when working a row. Here's how it all works out in the instructions: 6th row: Ch 3. Skip next dc and 3-dc group. *3 dc in sp between next 3-dc group. Skip next 3-dc group. Rep from * to last 2 dc. Skip next dc. 1 dc in last dc. Turn. (6 groups of 3-dc) 7th row: Ch 3. *Skip next 3-dc group. 3 dc in sp between next 3-dc group. Rep from * to last 3 dc group and dc. Skip next 3-dc group. 1 dc in last dc. Turn. (5 groups of 3-dc) The skipping is the key! Thank you for sharing your experience. -
Questions & Answers
Questions
Start typing your question and we'll check if it was already asked and answered.1 - 5 of 5 QuestionsQ: Hello, I’m currently making this bag, and im slightly confused. Hoping that you have a tutorial on how to put the bag together to show how to do it properly? I know a tutorial of the bag would help me a great deal🤞🏻
9 months ago1 AnswerA: Thank you for your interest in this pattern. At this time, we do not have a video tutorial available. We would be more than happy to assist you with any questions you may have. Please send your detailed questions to inquire@yarnspirations.com and one of our Pattern experts will get back to you as quickly as possible.
9 months agoHelpful?Q: Join Sides Fold piece in half lengthwise, with WS tog. Ch 1. Working along side edge, through both thicknesses to join, work 1 single crochet (sc) in each st to end of row. Fasten off Confused! Already joined sides w/flat stitch
a year ago1 AnswerA: If you have already joined the sides of the Red Heart Crochet Pack A Bunch Backpack using the flat seaming method and you like how it looks, keep it and move onto joining the straps. I can definitely see why you have joined the sides already from looking at the diagram. We apologize for the confusion and hope you enjoy the rest of your project.
a year agoHelpful?Q: I am making this backpack now also and have the same concern. The instructions for attaching the top straps are included and very specific in the pattern however there are no specific location instructions for the placement of the bottom straps. Thank you
a year ago2 AnswersA: From the design team: NOTE: Pin Straps into place at bottom edge on either side of 2 center Granny Squares, aligning ends of Straps with far last 6 sts of each Motif.See Diagram for Straps placement.
a year agoHelpful?Q: I am currently making this backpack. I am confused as to how the straps are attached especially the bottom. Please help!
a year ago1 AnswerA: For the Pack a Bunch Backpack, the straps are attached by sewing them into place. You can use the diagram on page 6 of the pattern as a guidance for placement. You may want to pin the straps into place first, and then use a yarn needle (large eye) and a whip stitch. As described in the pattern: Lay piece flat. Pin Straps into place at top edge on either side of 2 center Granny Squares, aligning ends of Straps with last 6 sts of each Motif. Using yarn needle, sew into place. I hope this can get you back on track. Do not hesitate to reach out if you have any other questions.
a year agoHelpful?Q: Pattern
a year ago0 Answers