Free Bernat Knit Hoodie Dog Coat Pattern, S
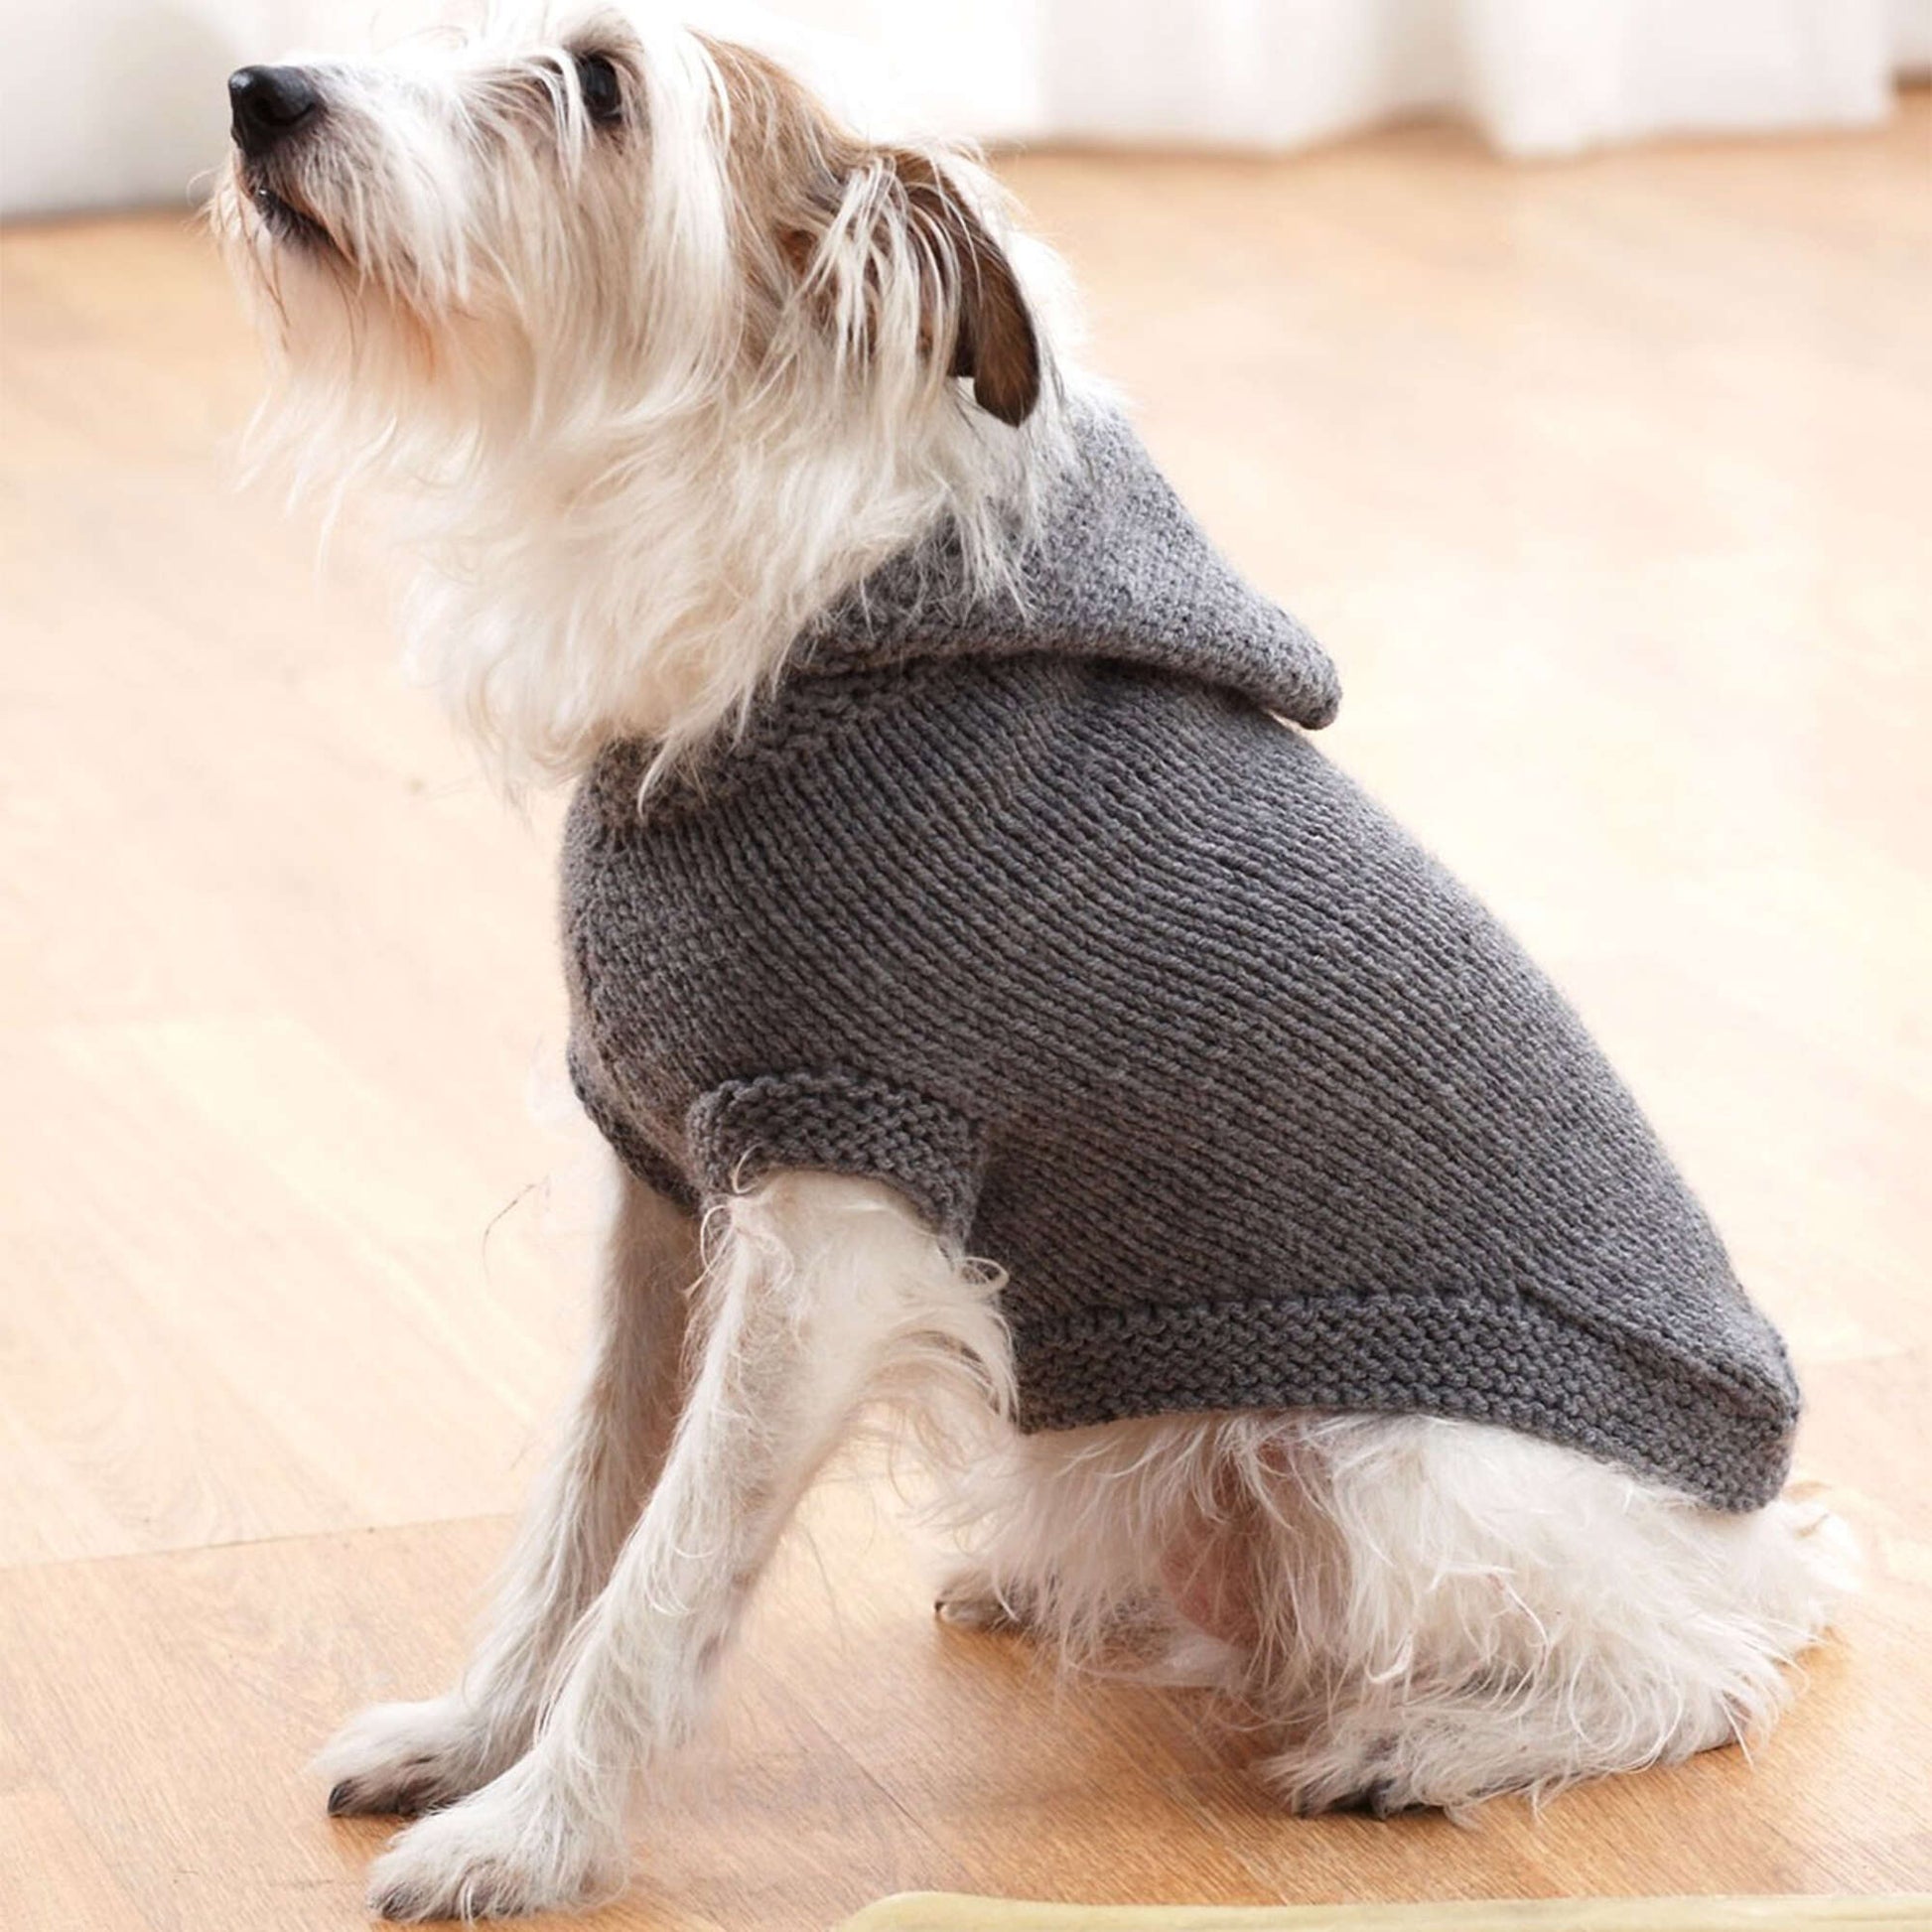
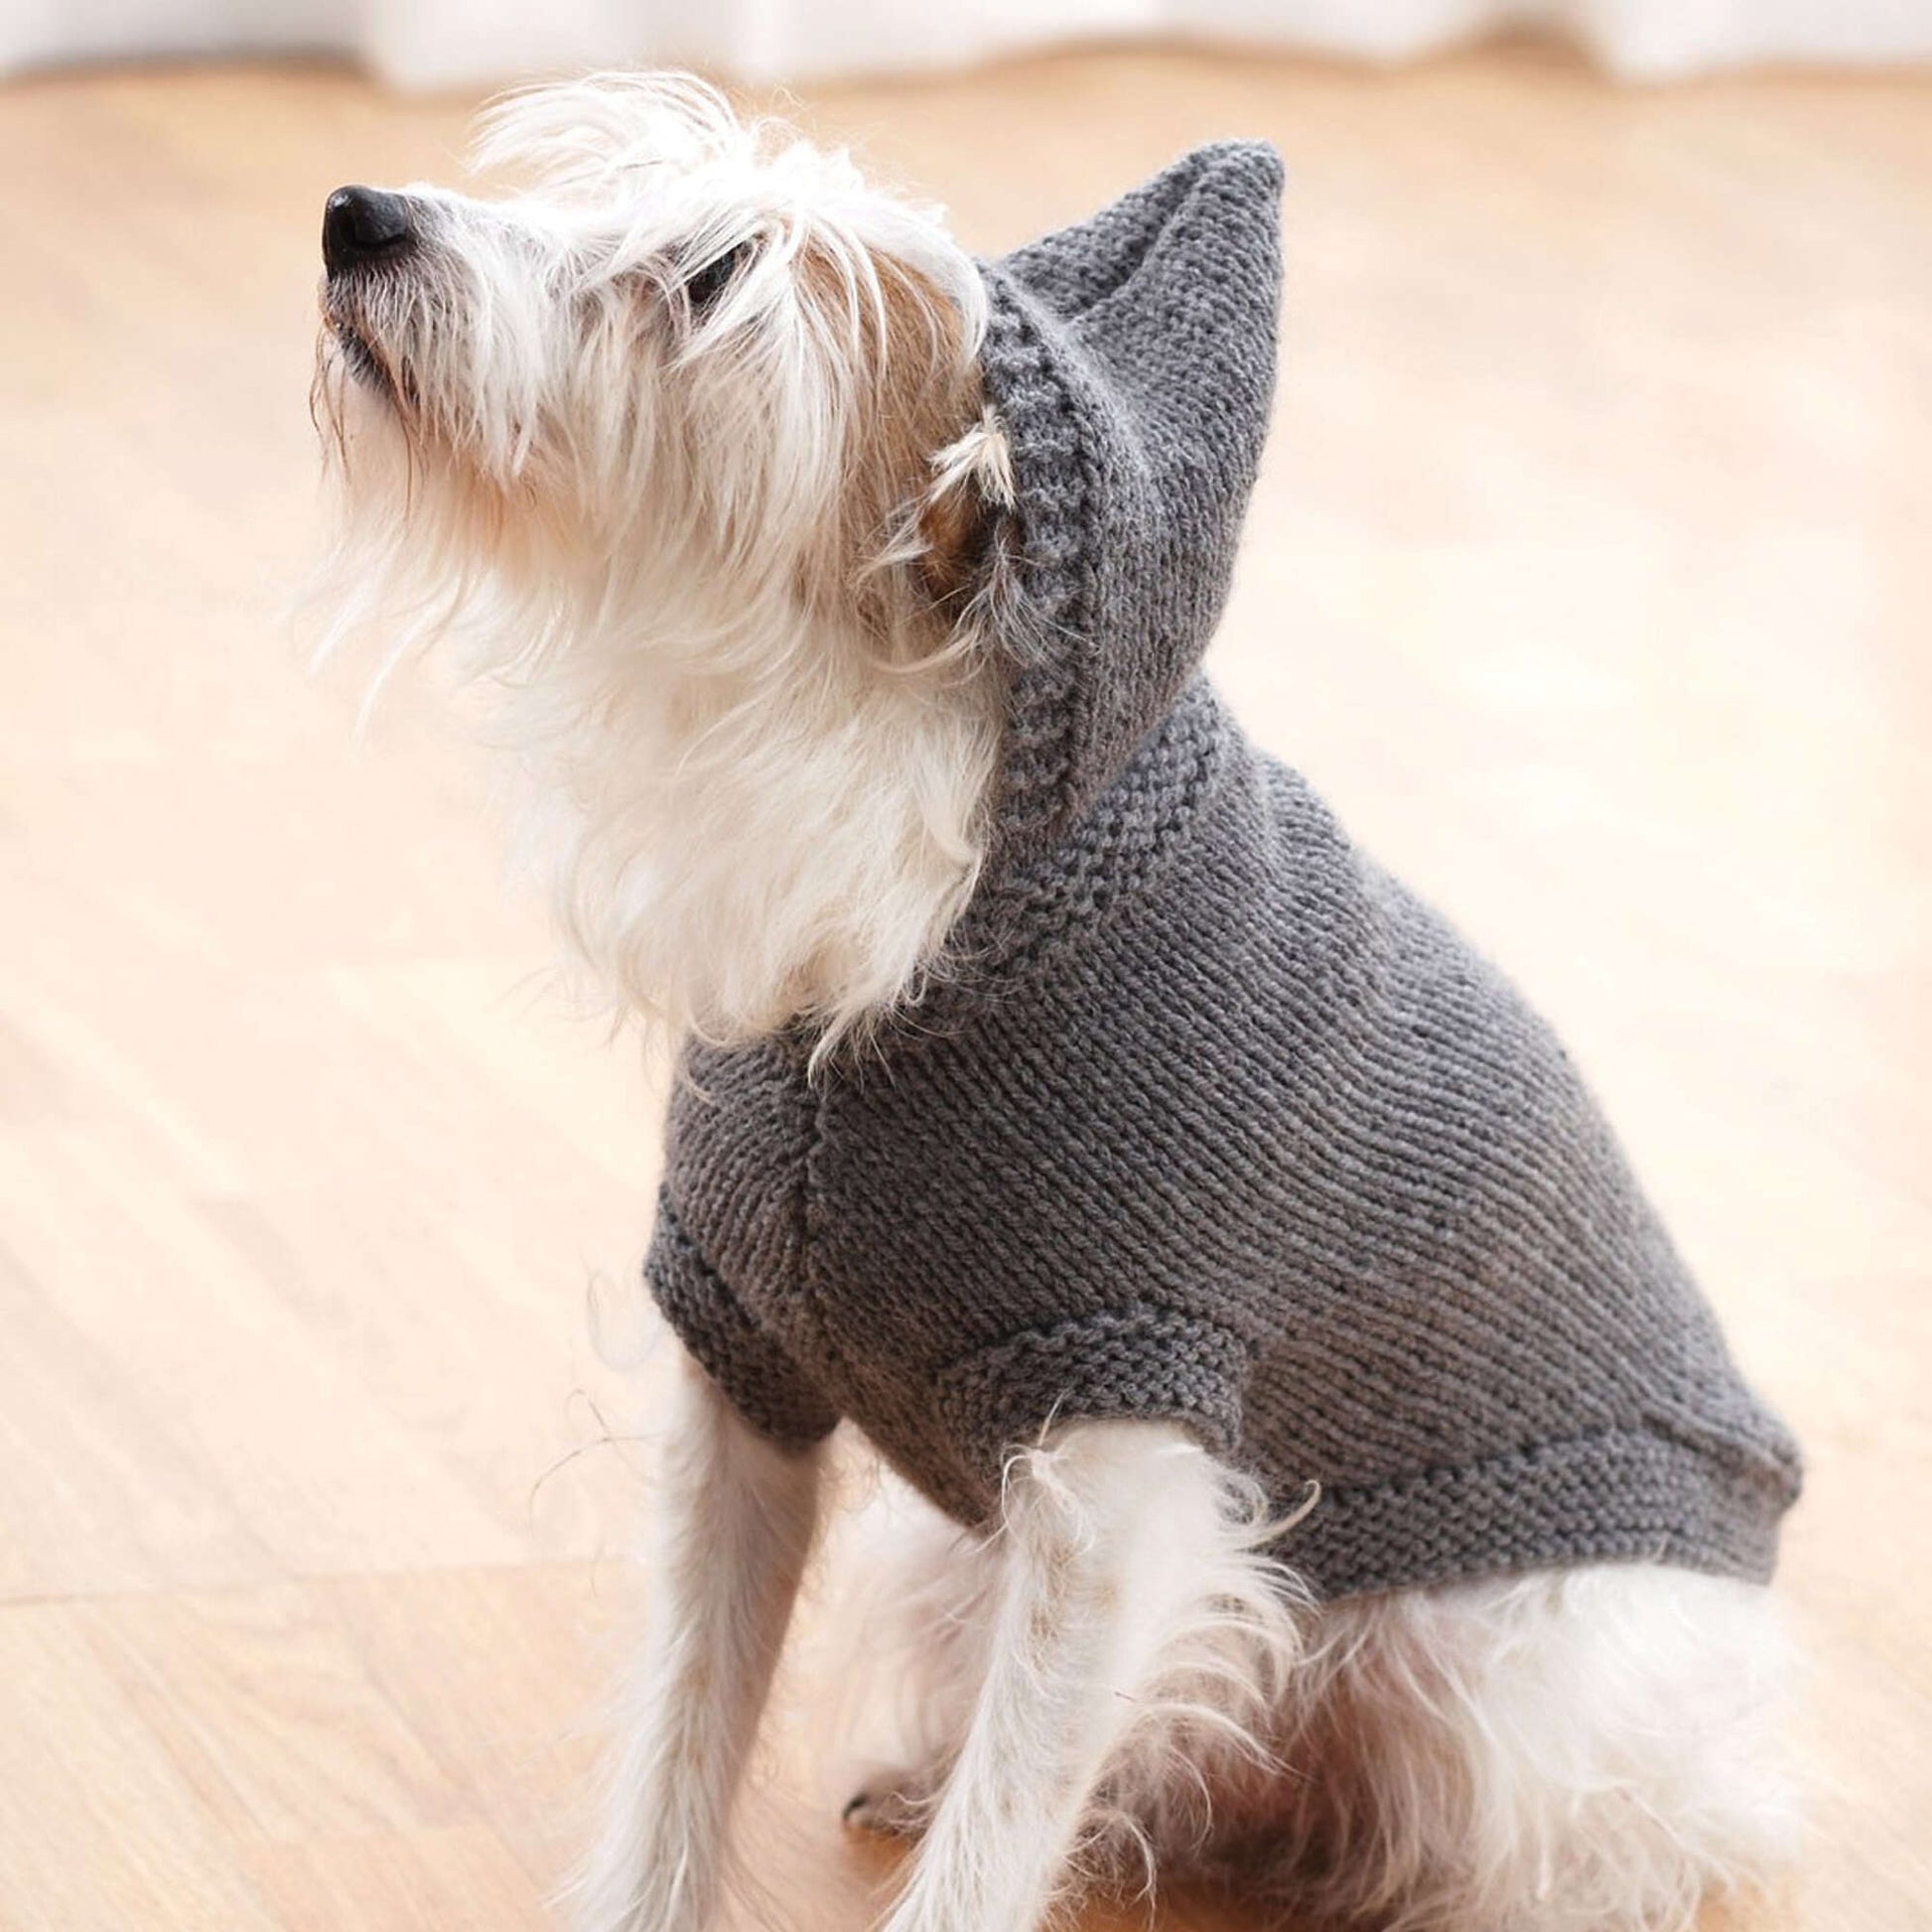


Free Bernat Knit Hoodie Dog Coat Pattern, S
Bernat Knit Hoodie Dog Coat
Item#
Skill level:
Easy
Knit
For accessibility support, please contact customer care at 1-888-368-8401 or access@yarnspirations.com.
customize your pattern kit
1
SELECT OPTIONS
2
Select Colors
Your Price
$0.00
-
Description
Free Easy Knit Sweater/Cardigan Pattern for Pets
How cute will your best friend look in this adorable dog hoodie? Make it from sizes S-XL with Bernat Super Value yarn for an easy-care and long-wearing, finished project. This one is so easy to make, it's perfect to inspire both the beginner knitter and dog lover.
-
Sizing Notes
Sizing Notes
Making the right size is important! To make sure your project turns out the size described, always make a gauge swatch to match your tension. First time swatching? Learn more about knitting a gauge swatch!
Finished Measurements
S 10 ins [25.5 cm] M 13 ins [33 cm]br> L 16 ins [40.5 cm] XL 24 ins [61 cm] -
Care
- Do Not Bleach
- Do Not Dry Clean
- Do Not Iron
- Machine Wash in Cool Water, Delicate Setting
- Tumble Dry, Low Heat, Delicate Cycle
-
Reviews & Ratings
Reviews
Average Ratings
Quality of Product, 3.0 out of 5Value of Product, 3.5 out of 5Filter Reviews
RatingLocale1 to 4 of 4 Reviews1 – 4 of 4 ReviewsHighest to Lowest Rating5 out of 5 stars.Fun pattern for adorable hoodie sweater
2 months agoThis pattern is fun and easy to follow. I wish the pattern provided instructions for larger dogs (25-29). Do give it a try!Yes, I recommend this product.
Helpful?Quality of Product, 5.0 out of 5Value of Product, 5.0 out of 5VirginiaSkill LevelEasy5 out of 5 stars.Simple instructions, quick project
2 years agoI knitted this for my small dog in the size medium. It was a very fast project. The instructions were clear and the gauge swatch was true to size of the finished sweater. There is a tricky part where you have to work 3 balls at once for a few rows so make sure you're prepared for the materials needed for that part.Yes, I recommend this product.
Helpful?Clarity of Pattern, 5.0 out of 5Skill LevelIntermediate2 out of 5 stars.Cute, but wording is questionable.
a year agoCurrently working on this project. Some of the wording is incredibly confusing. "Proceed in stocking st, inc 1 st at each end of needle on 3rd and every row to 50." Does this mean every third row an increase needs to be made, or only on the first 3rd row, and then every row following to the needed stitch allowance? Now that I am several hours into the project (having started over twice), my project is now wider than it is long, and I realize it was every 3rd row until 50. I guess I will frog and try again.Helpful?Clarity of Pattern, 2.0 out of 5Response from Yarnspirations:a year agoConsumer CareThe design team has come back and stated that it is meant to start increasing on row 3 and continue increasing every row to 50. Good luck with finishing your project! This one seems to be a favorite among pet owners.Kitchener ontario1 out of 5 stars.Sizing is a joke
a year agoThere is no dog in history that is an "xlg" and only 24 inches around. I have a lap dog and she is 26. I made the medium which should have been too big and half way through it's like yeah right. My dog is 20 pounds not 2No, I do not recommend this product.
Helpful?Quality of Product, 1.0 out of 5Value of Product, 2.0 out of 5Response from Yarnspirations:a year agoConsumer CareWe were very sorry to see your review. We value your feedback and would love to hear your concerns. We have passed your concerns on to our design team. -
Questions & Answers
Questions
Start typing your question and we'll check if it was already asked and answered.1 - 8 of 8 QuestionsQ: First of all, thank you for the pattern, it is very cute. However, I need a clarification. Once the opening section of the legs is done, can I start working in the round? Or should I always continue flat. Thank you
2 months ago1 AnswerA: If you are not already working in the round, you probably should not start after the leg openings. Although the pattern is designed to be knit flat if you want to continue your Hoodie Dog Coat in the round until the back shaping, make sure you know where the beginning of the row will be to make sure you cast off the stitches in the correct place.
a month agoHelpful?Q: When do you switch to the smaller needle size?
4 months ago1 AnswerA: Leg Edging: (RS). With double-pointed needles, pick up and knit 23 (29-32-38) sts around leg opening. Divide sts evenly on 3 needles. Join in rnd, placing a marker on first st. Work 8 rnds in garter st. Cast off. The smaller needles are the double-pointed needles.
4 months agoHelpful?Q: I don't understand the leg opening part. When do you join the other balls of yarn?
7 months ago2 AnswersA: When knitting your Knit Hoodie Dog Coat, after you work the first row of the leg opening, you will have knit across the row, worked two cast-off sections, and created three sections of knitting. In the next row, you will work the first group of stitches with the attached yarn. Then, take a new ball of yarn to work the second group of stitches, and a third ball of yarn to work the last section. This way, you will work across all three sections of knitting to complete each row and ensure that all three sections will be the same length.
7 months agoHelpful?Q: Back Ribbing with circular needle pick up and knit 67 sts along body from marker to back. Please explain, do I cast on 67 stitches.
a year ago1 AnswerA: Pick up and Knit is a technique by which you create new stitches along the edge of existing fabric. I'm happy to share a video that will walk you through the technique. Although the video is for a different project, it shows the technique clearly, and it starts at the point in the project that they are demonstrating pick up and knit. https://www.youtube.com/watch?v=s3X4DoCRZmg&t=66s I hope this can get you on track for your Hoodie Dog Coat. Do not hesitate to reach out if you have additional questions.
a year agoHelpful?Q: After joining the directions say continue even until work after neckband measures…. This is confusing. Am I continuing in stockinette stitch after the armholes until it measures 5(6 1/2, 8, 11)? is it 11 inches from the arm holes or from the beginning?
a year ago1 AnswerA: Yes, you'll be continuing in stockinette. The 11 inches is measured from after the neckband (i.e. when it stops being garter and is now stockinette). This is measuring the length of entire piece and not just the section after the armholes. I've attached a marked up picture to show you the portion.
a year agoHelpful?Q: After joining the armholes, the directions say continue even until work after neckband measures…. This is confusing. Am I continuing in stockinette stitch after the armholes until it measures 5(6 1/2, 8, 11)?
a year ago1 AnswerA: Yes, you'll continue in the stockinette until the required length. Any time a pattern says to "cont. even" it's the designers way of saying to continue with the established pattern without any increases/decreases. If the section is stockinette then you keep it in stockinette. If it's in garter, then you keep it in garter and so on.
a year agoHelpful?Q: Do you have to use 3 balls of yarn at the same time? Or can you keep going with 1? I’m confused when you’re suppose to add the other yarn.
a year ago1 AnswerA: I'm attaching a screenshot of the pattern where I've highlighted a couple sections. This is just so you have a visual. Each ball is attached to the stitches in the highlighted section. The first ball, the one you've been using this entire time, will continue to be used for the section highlighted in green. You won't have to join a new ball to this section. This will be an outer edge. The second ball of yarn will be attached to the section highlighted in yellow. You'll purl the stitches highlighted green first and then join the second ball to the ones highlighted yellow. This is the center panel and is what will go down the dog's chest/between the legs when worn. The third ball of yarn will be attached to the stitches highlighted blue. Once you've purled the center/yellow stitches, you'll join the third ball of yarn to these. These are also an outer edge. You can technically use one ball of yarn for this section but you will have to break it after each section and join to the next each time. The reason the pattern has you work this portion all at once with the three balls of yarn is so that you can ensure that you have worked the same number of rows for each one. It can be a bit fiddly to do it this way but you'll know that each section is the correct length and will match up during finishing. If you decide to work with only one ball of yarn you'll want to keep detailed notes of how many rows you've worked to get the length you need. Once you finish a section, you'll move the stitches to a stitch holder, break the yarn, join it to the next section, and work it the same way. Once all three sections have been worked you'll have two sections on stitch holders (the sections highlighted in green and yellow). You'd then move on to the joining row and proceed according to the pattern. I hope this gets you back on track!
a year agoHelpful?Q: When starting the hood, instructions say to place markers on the cast on edge. But the only cast on edge I currently have is the lower back, the opposite end from where a hood would go. Do I need to cast on a different needle?
2 years ago1 AnswerA: This pattern is worked from the neck opening down and begins with some basic garter stitch. If you're ready to work the hood, you'll have already worked the length of the body and have some stitches on a stitch holder to be used later. The hood is connected to the garter stitch you did at the start of the pattern. The markers are placed in that edge and are used to mark the area you pick up the hood stitches in. Once you've picked up your stitches, you can remove them. I hope that gets you back on track to finishing your project!
2 years agoHelpful?